Best Solar Panel Shading Analysis Tools and Software
Discover how solar panel shading analysis tools and software can boost your system's output and savings by up to 20 percent.
By Scott Thompson
Learn more about Solar Panel Installation and Repair for guides, costs, and what to expect.
Compare Solar Panel Installation and Repair Pros Near You
Enter your ZIP code to compare top-rated local professionals and request free quotes.
When you picture a solar installation, you probably imagine panels soaking up direct sunlight. But the reality is that most roofscapes have some shade, whether from a neighbor's chimney, a tall oak tree, or even a nearby utility pole. Shade is the silent killer of solar production: a single shaded cell can cut a panel's output by more than half, and a shaded string can drag down an entire array. That is why solar panel shading analysis tools and software have become indispensable for both homeowners and professional installers. These tools turn guesswork into precise, measurable data, helping you decide if solar is worth it, where to place panels, and which technology will perform best on your specific roof.
For a homeowner, a proper shading study can mean the difference between a system that saves you thousands over 25 years and one that underperforms from day one. For an installer, it is the difference between a satisfied customer and a warranty claim. In this guide, we will walk through the best software options, how they work, what they cost, and how to use them to maximize your solar investment. We will also connect these technical tools to the bigger picture of solar savings, so you can make a fully informed decision before signing any contract.
Why Shading Analysis Matters More Than You Think
Solar panels are rated under standard test conditions, which assume full, unobstructed sunlight. In the real world, your roof rarely sees those conditions. Shading from trees, nearby buildings, roof obstructions like chimneys and vents, and even dirt and bird droppings can reduce energy production. What makes shading particularly tricky is that it is not static. The sun moves across the sky, and shadows shift throughout the day and across seasons. A roof that looks sunny at noon in July might be heavily shaded at 9 a.m. in December. This dynamic nature is why a one-time visual inspection is not enough; you need a time-series analysis.
The financial impact is real. According to the National Renewable Energy Laboratory, even moderate shading can reduce a solar system's annual output by 10 to 20 percent. Over the 25-year lifespan of a typical residential system, that could translate to thousands of dollars in lost electricity savings. In some cases, shading can even make a solar investment unprofitable. That is why any reputable solar installer should perform a detailed shading analysis before designing your system. As a homeowner, you should ask for that analysis report. It is your insurance that the quoted production numbers are realistic, not just optimistic marketing.
Moreover, shading analysis is not just about maximizing output. It also affects the longevity of your panels. When a cell is shaded, it can become reverse-biased and heat up, a phenomenon known as a hot spot. Over time, hot spots can degrade the panel and lead to premature failure. Modern panels include bypass diodes to mitigate this, but the risk is still present. A good shading analysis can help you avoid these problem areas altogether, or choose a system design with microinverters or power optimizers that minimize the impact of unavoidable shade.
Key Features to Look For in Shading Tools
Before we dive into specific software, it helps to know what features separate a professional-grade tool from a simple sun-position calculator. Here are the core capabilities to look for:
- 3D modeling of your property: The ability to create a three-dimensional model of your roof, including obstructions like trees, chimneys, and neighboring buildings, is essential. This allows the software to simulate shadows accurately.
- Time and season simulation: The tool should calculate sun paths for different times of the day and different months of the year, giving you an annual production estimate, not just a single snapshot.
- Photovoltaic (PV) system simulation: The software should model the performance of your specific solar panel model, inverter type, and system layout. It needs to account for wiring losses, temperature effects, and inverter efficiency.
- Production and financial estimates: The output should include kilowatt-hours generated per year, along with a financial analysis of your savings, payback period, and return on investment.
Tools that offer these features provide a comprehensive picture. They allow you to compare different panel placements, test different system sizes, and even evaluate the economic impact of trimming a tree. Without these features, you are essentially flying blind.
Top Solar Panel Shading Analysis Tools and Software
The market offers a range of options, from free mobile apps for quick checks to professional desktop software with advanced simulation engines. Here are the most widely used and respected tools in 2026.
1. Aurora Solar (Professional-Grade)
Aurora Solar is the industry standard for solar design and sales software. It is a cloud-based platform that combines high-resolution aerial imagery with a powerful 3D modeling engine. You can draw your roof, place panels, and add trees and other obstructions. Aurora then uses its simulation algorithms to calculate shading losses and annual production with remarkable accuracy. It also includes a financial module that helps installers create proposals for customers.
Aurora is not a free tool. It is a subscription service aimed at professional solar companies, with pricing typically starting around a few hundred dollars per month. However, as a homeowner, you can indirectly benefit from Aurora because most top-tier installers use it. When you receive a proposal from an installer using Aurora, you can be confident that the production numbers have been calculated with a high degree of precision. If you are a savvy homeowner, you can ask for a copy of the Aurora report to verify the design.
2. Helioscope (Engineering and Design)
Helioscope, now part of Folsom Labs, is another professional favorite. It offers a streamlined workflow for designing commercial and utility-scale solar projects, but it also works well for residential. Its key strength is its speed and ease of use, while still delivering detailed shading analysis. Like Aurora, it uses aerial imagery and 3D modeling to simulate shadows. Helioscope provides detailed loss diagrams, showing exactly how much each factor (shading, soiling, wiring, temperature) affects your system's output.
Helioscope is also a subscription tool, with a free trial available. It is less focused on sales proposals and more on engineering accuracy. If an installer uses Helioscope, it signals a strong commitment to technical precision. For homeowners doing their own research, Helioscope's free trial can be a valuable way to model your own roof and understand the shading impacts, although the learning curve can be steep for a non-professional.
3. PVWatts (Free Government Tool)
For a quick, no-cost estimate, the National Renewable Energy Laboratory (NREL) offers PVWatts. This web-based calculator is a fantastic starting point. You input your address, system size, and basic parameters, and it estimates annual production based on typical meteorological year (TMY) data. However, PVWatts has a major limitation: it does not account for site-specific shading. It assumes your panels have zero shading, which is rarely the case.
PVWatts does allow you to adjust the system losses percentage manually, which you can use to estimate shading losses if you have data from another tool. But it cannot model the shadows from your neighbor's oak tree. Therefore, PVWatts is best for a rough initial estimate, not for final system design. Still, it is an excellent educational tool to understand your solar potential before you contact an installer. You can use it to benchmark the quotes you receive, ensuring that the installer is not inflating your production numbers.
4. SunEye (On-Site Measurement)
While most software relies on aerial imagery, the SunEye is a handheld device used for on-site solar site surveys. It looks like a digital camera with a fish-eye lens. The installer points it at the sky, and it captures a 360-degree image of the horizon, including all obstructions. The device then calculates the solar access for that specific location, taking into account the exact sun path for your latitude.
The SunEye is highly accurate and is still used by many installers for detailed site assessments, especially for complex roofs or when aerial imagery is not clear. The downside is that it is an expensive piece of hardware, mostly used by professionals. As a homeowner, you will likely see the results of a SunEye survey in your proposal. It gives you confidence that the installer actually visited your site and measured the shading, rather than just relying on satellite data.
5. Mobile Apps (Quick and Convenient)
For a quick, on-the-go check, several mobile apps can give you a basic idea of shading. Apps like Sun Surveyor, SunCalc, and PV Solar Pro use your phone's GPS and compass to show the sun's path overlaid on your camera view. You can hold your phone up to the sky and see where shadows will fall at different times. These apps are great for a preliminary assessment, such as identifying if a large tree on the west side of your property will block afternoon sun.
However, they are not a substitute for professional software. They do not model your roof, calculate panel performance, or give you production estimates. They are best used as a first step to spot obvious problems. If you see that a major obstruction shadows your prime roof area during peak sun hours, you know you will need a more detailed analysis or possibly consider a different location for your panels.
How to Perform a DIY Shading Analysis
You do not need to be a solar engineer to get a good sense of your shading situation. Here is a simple methodology you can use with free tools.
- Map your property: Use a satellite view from Google Maps or your local GIS to print out a bird's-eye view of your roof. Mark the locations of trees, chimneys, and other obstructions.
- Use a sun path chart: Find a sun path chart for your latitude (easy to find online). This chart shows the sun's altitude and azimuth for every hour of the year. You can print it out and overlay it on your property map to see which areas will be shaded at different times.
- Walk your property: Go outside with a compass and a solar path app on your phone. Stand at the corners of your roof and use the app to see if the sun will rise above the obstructions during the winter months when the sun is lower in the sky.
- Estimate shading percentage: Based on your observations, estimate the percentage of shading your roof receives during peak sun hours (9 a.m. to 3 p.m.). Even a 5% shading loss can be significant over a year.
This DIY method gives you a rough idea, but it has limitations. It is hard to account for the exact height of trees and the diffuse nature of light on cloudy days. For a precise number, you will want to use a professional tool or hire an installer who does.
Interpreting Shading Analysis Results
Once you have a shading analysis report, you will see a few key metrics. The first is the shading loss, expressed as a percentage of total possible production. A good system will have shading losses of 5% or less. If your shading loss is above 10%, you should consider redesigning the system or removing obstructions. The second metric is the energy yield, usually measured in kilowatt-hours per kilowatt of installed capacity (kWh/kWp). This number tells you how many kilowatt-hours your system will produce per year for every kilowatt of panel capacity. In a sunny state like Arizona, you might see yields above 1,500 kWh/kWp, while in cloudy New England, it might be closer to 1,200 kWh/kWp.
The report will also often include a solar access percentage, which is the amount of sunlight your panel receives compared to a perfectly unobstructed panel. A 95% solar access means your panels will produce 95% of their rated capacity. This is a useful number to compare against the installer's production guarantee. If an installer guarantees a certain production, it should be based on the solar access from the shading analysis.
Another important output is the production by month. This chart shows you how your system's output will vary seasonally. In the winter, when the sun is lower and days are shorter, production will drop. If you have significant shading from evergreens, you might see a steep drop in winter production. This monthly breakdown helps you plan for net metering and understand your electricity bills throughout the year.
Shading Mitigation Technologies
If your shading analysis reveals unavoidable shade, do not despair. Modern solar technology has evolved to handle partial shading much better than before. The two main solutions are microinverters and power optimizers.
Microinverters are small inverters attached to each individual panel. They allow each panel to operate independently, so if one panel is shaded, it does not affect the output of the others. This is called module-level power electronics (MLPE). Power optimizers do a similar job, but they are paired with a central string inverter. They condition the DC power at each panel before sending it to the central inverter. Both technologies ensure that the maximum possible power is harvested from each panel, even when some are shaded.
For roofs with complex shading, MLPE is highly recommended. The extra upfront cost is often offset by the increased energy production over the system's life. In fact, in a shading analysis tool, you can compare system designs with and without MLPE to see the financial difference. This allows you to make an evidence-based decision about whether the added cost is worth it.
Another mitigation strategy is simply to design the system to avoid the shaded areas altogether. This might mean placing panels only on the sunniest part of your roof, even if that means a smaller system. A smaller, unshaded system will produce more energy per installed watt than a larger, shaded one. The shading analysis tool helps you optimize the number of panels and their placement to achieve the best return on investment.
Using Shading Data to Compare Solar Quotes
When you receive quotes from multiple solar installers, you should compare more than just the price per watt. The shading analysis should be a central part of your decision. Ask each installer to provide a copy of their shading report. Then compare the estimated annual production. Be wary if one installer's estimate is significantly higher than another's for the same system size. It could mean they are being overly optimistic about shading, or they are using a different, more favorable simulation method.
A good practice is to ask each installer to use the same tool, such as Aurora or Helioscope, and to share the loss diagram. This allows for an apples-to-apples comparison. For example, if Installer A says your annual production is 10,000 kWh with 8% shading losses, and Installer B says 11,000 kWh with 2% shading losses, you can be more confident in Installer B's numbers if their assumptions are more transparent. You should also verify that the installer accounts for your roof pitch, orientation, and local climate, not just shading. In our guide on solar installation estimate tools, we explain how to compare quotes effectively and avoid surprises.
Remember, shading analysis is not just about the physical shadows. It also affects your financial projections. A system that produces less power means lower electricity bill savings, and a longer payback period. If you are financing your system, the monthly loan payment might be higher than your electricity savings, which would be a negative cash flow. A reliable shading analysis ensures that your financial model is accurate. For a deeper dive into how solar savings are calculated, you can use a free solar savings calculator, which often incorporates shading data.
Now, when you are ready to move forward, you might want to get multiple quotes from local solar installers who use these professional tools. A service like FreeSolarPowerQuotes can connect you with vetted solar providers in your area. They will perform a thorough shading analysis as part of their proposal, giving you the data you need to make a confident choice.
Beyond Software: The Importance of On-Site Assessment
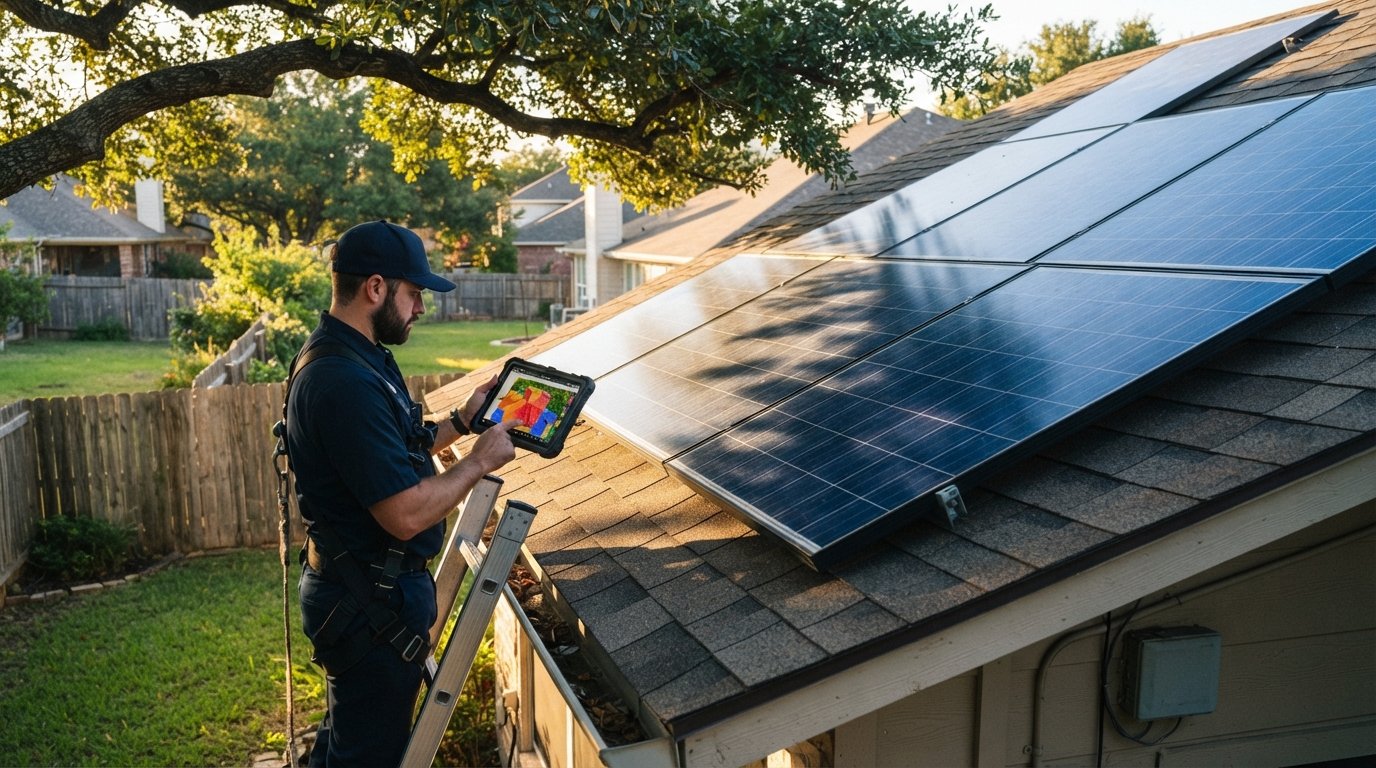
While software tools are powerful, they are only as good as the data they receive. Aerial imagery can be outdated, and the resolution may not be high enough to see small obstructions like a new antenna or a growing tree. That is why professional installers should always conduct an on-site assessment in addition to using software. During this visit, they can verify the roof condition, measure the exact dimensions, and visually inspect the shading environment. They might use a SunEye device to capture precise solar access data at specific roof locations.
As a homeowner, you should welcome this on-site visit. It is your opportunity to ask questions about the proposed system design and the shading analysis. Ask the installer to point out the shaded areas on your roof and explain how they plan to mitigate them. A reputable installer will be happy to walk you through the data. If an installer tries to design a system without ever visiting your roof, that is a red flag. You should never rely solely on a remote design, especially if you have a complex roof or significant shade.
On-site assessments also help identify other issues that affect solar production, such as the type of roof covering (tile, asphalt, metal) and its condition. The installer can check for any structural issues that might need to be addressed before the panels are installed. All of these factors, combined with the shading analysis, contribute to a reliable system design.
Shading Analysis for Commercial Solar Projects
While this article has focused heavily on residential, shading analysis is equally critical for commercial and industrial solar installations. Commercial roofs often have extensive HVAC equipment, skylights, and parapet walls that can cast long shadows. Furthermore, the financial stakes are higher because the system is larger, and the owner expects a predictable return on investment. A 2% shading loss on a 500 kW system can mean tens of thousands of dollars in lost revenue over the project's life.
Professional tools like Helioscope and Aurora are essential for commercial projects. They can model complex roof geometries and multiple obstructions. They also allow for the design of different system layouts to minimize shading from existing structures. For ground-mounted systems, shading analysis is used to determine the optimal spacing between rows of panels so that they do not shade each other, especially in the winter when the sun is low. This is known as inter-row spacing, and it is a critical design factor.
Commercial solar projects also benefit from more advanced modeling that includes the specific inverter and its loading ratio. Shading analysis can help you decide whether to use a string inverter with a single maximum power point tracker or multiple trackers to handle different orientations and shading patterns. The software can simulate the performance of different configurations, helping you choose the most cost-effective solution.
Future Trends in Shading Analysis
The world of solar shading analysis is constantly evolving. One exciting trend is the increasing use of LiDAR (Light Detection and Ranging) data. LiDAR provides highly accurate 3D maps of the terrain, including vegetation and buildings. Some software tools are beginning to integrate LiDAR data to create more realistic models without the need for a physical site visit. This is particularly useful for large-scale solar farms where on-site surveys are time-consuming.
Another trend is the use of machine learning to predict shading patterns. These algorithms can analyze historical solar production data and weather patterns to forecast the impact of shading with greater accuracy. This is especially useful for optimizing system performance over time, as trees grow or new buildings are constructed nearby. Some monitoring platforms now continuously analyze production data to detect unexpected shading losses, allowing for proactive maintenance.
Finally, the integration of shading analysis with battery storage design is becoming more common. If you have a shaded roof, you might be a good candidate for a battery system that can store excess energy produced during sunny periods for use during shaded times. Shading analysis software can help you size the battery appropriately and optimize its charging schedule. This holistic approach ensures that you get the most out of your entire solar-plus-storage system.
Your Next Steps: From Analysis to Installation
You now have a thorough understanding of solar panel shading analysis tools and software. The next step is to put this knowledge to use. Start by doing a preliminary check with PVWatts to get a baseline estimate. Then, use a mobile app to observe shadows on your roof at different times of the day. If you see significant shade, consider using a more advanced tool like Helioscope's free trial to model your roof in detail.
Most importantly, when you contact solar installers, ask them to share their shading analysis reports. Compare the production estimates and the assumptions behind them. Do not be afraid to ask questions about the shading loss percentage and how they plan to mitigate it. If you receive a quote that seems too good to be true, it probably is, especially if the shading analysis is not included.
When you are ready to get quotes, consider using a referral service that connects you with pre-screened installers. This saves you time and ensures that you are working with professionals who have the right tools and expertise. Remember, the goal is not just to install solar panels, but to install a system that will generate maximum savings for the next 25 years. Shading analysis is your best tool to achieve that goal.
With the right software and a trustworthy installer, you can turn your roof's solar potential into reality, even if it is not perfectly unshaded. The key is to measure, model, and mitigate. By doing so, you will be well on your way to reaping the financial and environmental rewards of solar energy.
Learn more about Solar Panel Installation and Repair for guides, costs, and what to expect.
Compare Solar Panel Installation and Repair Pros Near You
Enter your ZIP code to compare top-rated local professionals and request free quotes.