
How to Install Solar Panels: A Step-by-Step Guide
Discover the complete process to install solar panels, from assessing your roof to choosing equipment and finding certified installers. Save money and energy.
By Scott Thompson
Learn more about Solar Panel Installation and Repair for guides, costs, and what to expect.
Compare Solar Panel Installation and Repair Pros Near You
Enter your ZIP code to compare top-rated local professionals and request free quotes.
Solar energy has moved from a niche ideal to a mainstream financial decision. With electricity rates climbing and federal incentives still available, thousands of homeowners are asking the same question: should I install solar panels? The answer is often yes, but the path from decision to working system involves more than just mounting hardware on your roof. It requires planning, permits, equipment choices, and a clear understanding of your home's energy profile. This guide walks you through the entire process, from initial assessment to final connection, so you know exactly what to expect and how to avoid costly mistakes.
Assessing Your Home's Solar Potential
Before you commit to any equipment, you need to know if your property is a good candidate. Solar panels need sunlight, and not every roof gets enough. Start by evaluating your roof's orientation, pitch, and shading. In the northern hemisphere, south-facing roofs capture the most sun, but east and west-facing arrays can still perform well, especially with modern inverter technology. Shading is a critical factor; even a single tree branch can reduce a panel's output significantly. Tools like the National Renewable Energy Laboratory's PVWatts calculator can give you a rough estimate of your site's solar resource.
Next, review your electricity consumption. Your past 12 months of utility bills show your average monthly usage, which determines the size of the system you need. A typical American home uses around 886 kWh per month, but your number could be higher or lower depending on square footage, appliances, and electric vehicle ownership. You want a system that covers 100% of your consumption, or slightly less if your utility has unfavorable net metering rules. Over-sizing can lead to wasted generation, while under-sizing leaves you with lingering bills.
Finally, check your roof's condition. Solar panels last 25 to 30 years, so your roof should have at least that much life left. If your roof is older or damaged, replace it before installation. Adding panels to an aging roof means you will have to remove and reinstall them later, which adds cost. A professional installer will inspect your roof's structure, decking, and rafters to confirm it can support the added weight and wind loads.
Choosing the Right Solar Equipment
Once your site is deemed viable, the next step is selecting the components. Solar panels come in three main types: monocrystalline, polycrystalline, and thin film. Monocrystalline panels are the most efficient and the most common for residential use, typically achieving 20% to 22% efficiency. Polycrystalline panels are slightly less efficient but cheaper. Thin film panels are flexible and lightweight, but they require more space, making them less practical for most homes.
Inverters are equally important. They convert the direct current (DC) electricity from your panels into the alternating current (AC) your home uses. The three main options are string inverters, microinverters, and power optimizers. String inverters are the most affordable but they operate at the efficiency of the worst panel in the string. Microinverters attach to each panel, so they handle shading better and offer panel-level monitoring. Power optimizers combine the two: they condition the DC power at each panel before sending it to a central string inverter.
You may also need a solar battery, especially if you want backup power during outages or if your utility has time-of-use rates. Batteries like the Tesla Powerwall or LG Chem RESU store excess energy for later use. They add significant cost, but they also provide energy independence and can increase the value of your system. Consider your goals: if you simply want to lower bills, skip the battery; if you want resilience, it is worth the investment.
Permits, Incentives, and Paperwork
No solar installation can begin without the necessary permits. Most jurisdictions require an electrical permit, and some require a building permit. Your installer will typically handle this paperwork, but you should understand the process. They will submit your system design and specifications to your local building department for approval. This can take anywhere from a few days to a few weeks, depending on your location.
Incentives are a major part of the financial picture. The federal Investment Tax Credit (ITC) allows you to deduct 30% of your system cost from your federal taxes. This credit is available through 2032, but it steps down to 26% in 2033 and 22% in 2034. Many states, utilities, and municipalities offer additional rebates, tax credits, or performance-based incentives. For example, California's Self-Generation Incentive Program (SGIP) provides rebates for battery storage, while New York offers the NY-Sun program. Your installer should help you identify and apply for these incentives, but you can also research them through the Database of State Incentives for Renewables and Efficiency (DSIRE).
Net metering is another crucial policy. It determines how you are credited for the excess electricity your system sends to the grid. Under full retail net metering, you receive a one-to-one credit for every kWh you export. Some utilities offer net billing, which credits you at a wholesale rate instead. Understanding your utility's policy is essential because it affects your payback period. If net metering is unfavorable, you might want to size your system to minimize exports, or add a battery to store excess energy.
Finding a Certified Installer
The quality of your installation is just as important as the equipment. A poorly installed system can underperform, leak, or even create a fire hazard. You need a certified professional, not a handyman. Look for installers who are licensed, insured, and certified by the North American Board of Certified Energy Practitioners (NABCEP). This certification is the gold standard in the solar industry.
Get multiple quotes from different companies. A reputable installer will conduct a site visit, review your energy usage, and provide a detailed proposal. Compare not just the total price, but also the equipment brands, warranties, and installation timelines. Be wary of high-pressure sales tactics or promises that sound too good to be true. A legitimate installer will be transparent about system performance and payback period.
One of the easiest ways to find vetted installers is through a quote service like NewSolarQuotes. This platform connects you with certified professionals in your area, saving you the hassle of researching dozens of companies. You fill out a simple form with your address and utility information, and you receive competitive quotes from pre-screened installers. This approach ensures you are comparing apples to apples and avoids the risk of working with a less reputable contractor.
The Installation Process: What to Expect
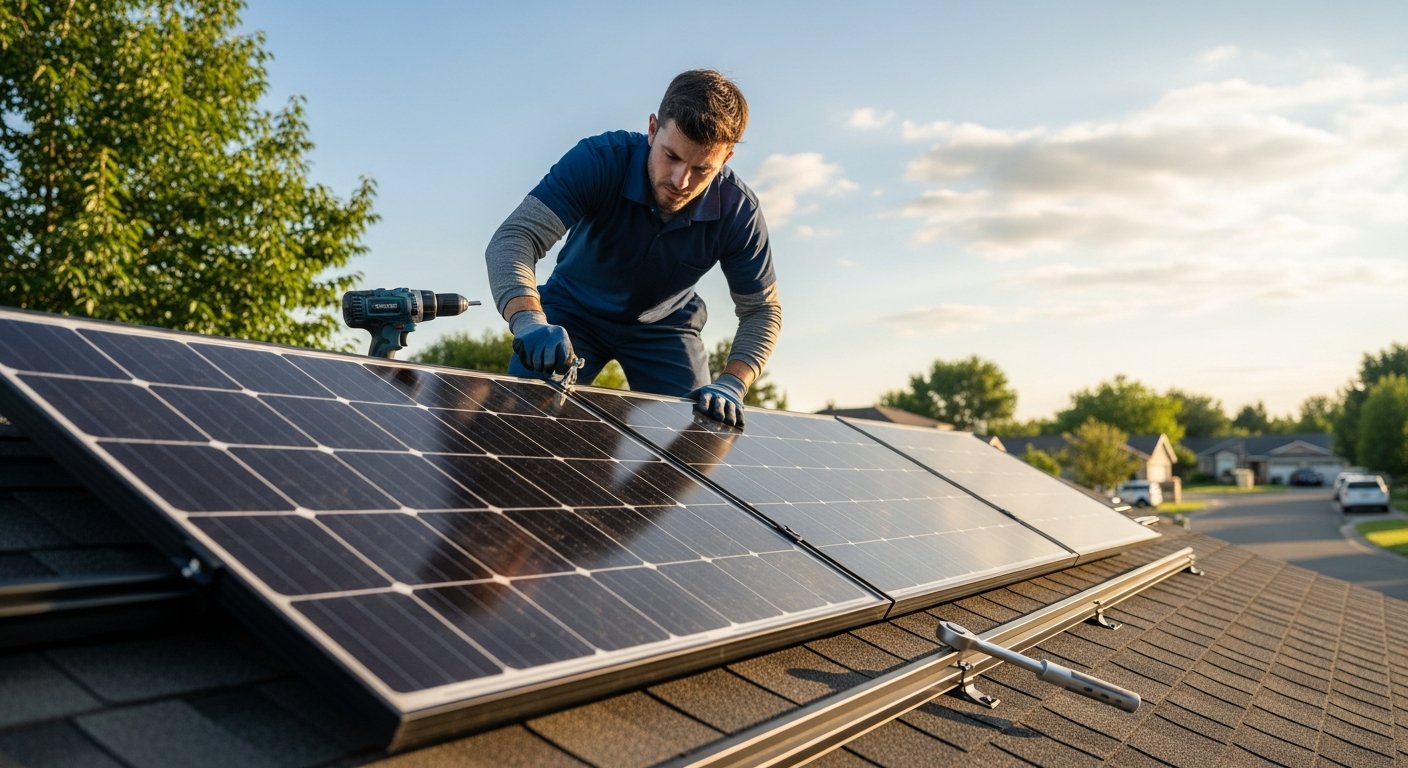
Once you have selected an installer and signed a contract, the physical installation typically takes one to three days. The process begins with a site visit to confirm measurements and finalize the design. On installation day, the crew will first set up scaffolding and safety equipment. They will then attach mounting rails to your roof, securing them to the rafters with lag bolts. Flashing is installed around each attachment point to prevent leaks.
Next, the panels are lifted onto the roof and fastened to the rails. Wiring is run from the panels to the inverter, which may be installed inside your garage or on an exterior wall. The inverter is connected to your electrical panel via a dedicated breaker. If you are getting a battery, it is installed in a location that meets local fire codes, often in the garage or outdoors. The entire system is grounded and inspected for safety.
After the physical installation, a local inspector will visit to verify the system meets code. This inspection is required before your utility will approve the interconnection. Once approved, your utility will install a net meter, which measures the electricity you import and export. The final step is to turn the system on and activate it in your monitoring portal. You should receive a switch-on date, and from that point, your home is generating clean energy.
Costs, Financing, and Return on Investment
The cost of a solar panel system varies widely based on your location, equipment choices, and system size. As of 2025, the average residential system in the United States costs between $15,000 and $25,000 before incentives. After the 30% federal tax credit, that drops to about $10,500 to $17,500. Prices have fallen dramatically over the past decade, but they still represent a significant upfront investment.
Fortunately, there are multiple financing options. A cash purchase gives you the best return on investment because you avoid interest charges. Solar loans allow you to spread the cost over 10 to 20 years, with monthly payments often lower than your electricity bill. Leases and power purchase agreements (PPAs) require no money down, but you do not own the system, and the financial benefits are lower. Choose the option that aligns with your cash flow and long-term goals.
Your payback period depends on your electricity rates, system cost, and incentives. In states with high electricity rates like Massachusetts or California, payback can be as short as five years. In lower-rate states, it might stretch to 12 years. After the payback period, your electricity is essentially free for the remaining life of the system. Additionally, solar panels can increase your home's resale value by about 4.1% according to Zillow, making it a solid investment for the future.
Maintenance and Monitoring
Solar panels are remarkably low maintenance. They have no moving parts, and rain naturally washes away most dirt and debris. However, in dry climates or areas with heavy pollution, you may need to clean them occasionally. A simple hose or a soft brush with soapy water is sufficient. Avoid abrasive materials or pressure washers, which can damage the glass. If your panels are mounted at a steep angle, cleaning may be unnecessary, as rain will do the job.
Monitoring is essential to ensure your system is performing as expected. Most modern inverters and batteries come with monitoring software that tracks production and alerts you to issues. You should review your production regularly, especially after storms or other events that could cause damage. If you notice a sudden drop in output, contact your installer. Many systems include performance warranties that guarantee a certain level of production for 25 years.
At the end of the day, installing solar panels is a significant but rewarding project. It requires research, financial planning, and professional help. But the benefits are clear: lower electricity bills, increased property value, and a reduced carbon footprint. If you are ready to take the next step, start by getting quotes from certified installers. NewSolarQuotes offers a free, no-obligation quote service that connects you with trusted professionals in your area. With the right install and a little patience, you can enjoy clean energy for decades to come.
Learn more about Solar Panel Installation and Repair for guides, costs, and what to expect.
Compare Solar Panel Installation and Repair Pros Near You
Enter your ZIP code to compare top-rated local professionals and request free quotes.