
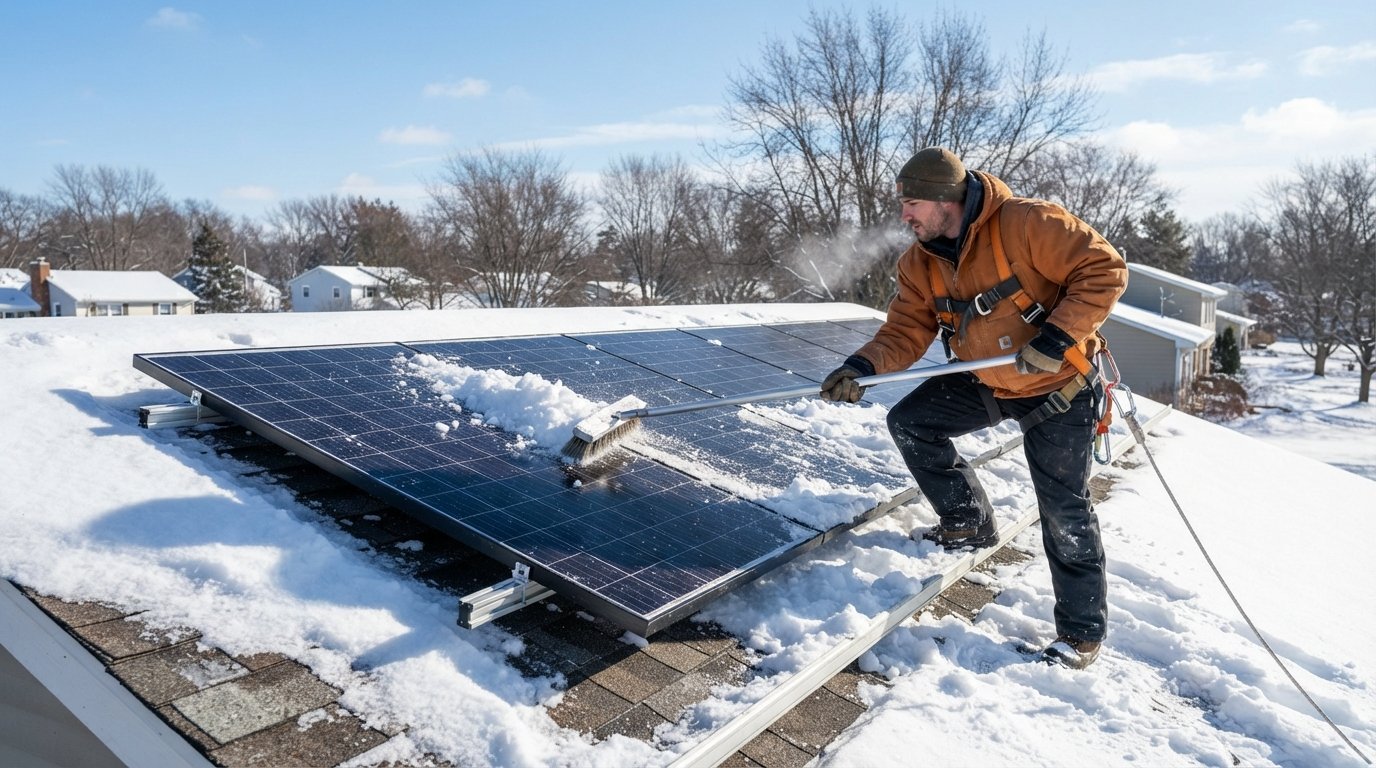
Optimizing Solar Panel Performance in Cold Climates
Optimizing solar panel performance in cold climates starts with snow strategy and tilt checks. Call (833)-212-3715 for expert installer guidance.

By Alexia Mabel
Learn more about Solar Panel Cleaning for guides, costs, and what to expect.
Compare Solar Panel Cleaning Pros Near You

Enter your ZIP code to compare top-rated local professionals and request free quotes.
When the first heavy snow blankets your roof, the last thing you might expect is that your solar panels could be working better than they do in July. Yet that is exactly what happens in many cold-climate installations. Crystalline silicon panels actually generate more voltage at lower temperatures, and the intense reflection off snow can boost production on clear winter days. The catch is that winter also brings shortened daylight hours, low sun angles, snow accumulation, and freeze-thaw cycles that can quietly damage panel integrity. Optimizing solar panel performance in cold climates is therefore less about fighting the cold and more about managing snow, adjusting for the sun's low arc, and catching small problems before they become expensive ones. This guide walks through the physics, the practical tactics, and the inspection habits that separate a productive winter array from one that sits idle under a white blanket for weeks.
How Cold Temperatures Actually Affect Panel Voltage and Efficiency
Solar panels are rated at 25 degrees Celsius (77 degrees Fahrenheit) under standard test conditions. When the mercury drops well below that, the semiconductor material inside each cell becomes more conductive, which raises the open-circuit voltage and allows the panel to convert a slightly larger share of incoming light into usable power. A common temperature coefficient for a quality monocrystalline panel is around negative 0.3 percent per degree Celsius, meaning that for every degree below 25 C, the panel gains roughly 0.3 percent in power output. On a crisp 10 F morning (about negative 12 C), that translates to a meaningful boost over the nameplate rating.
This voltage increase is a genuine advantage, but it comes with two caveats. First, the effect only matters when sunlight actually reaches the cells; a panel buried under snow produces nothing regardless of temperature. Second, the higher voltage must stay within the input window of your inverter. Most modern string inverters and microinverters are designed with cold-weather voltage headroom, but older or undersized equipment can clip or shut down on extremely cold, bright mornings. If your system was sized without accounting for record-low temperatures, ask your installer to verify the inverter's maximum input voltage against the panel string's cold-temperature Voc calculation. That single check can prevent nuisance outages in January.
Efficiency also depends on keeping the panel surface clear and the airflow behind it unobstructed. Cold air is denser, which helps heat dissipation, but snow piled against the back of roof-mounted panels or ice dams forming at the array's lower edge can trap heat in unexpected ways and stress wiring. The takeaway is that cold itself is an ally; the real enemies are shading from snow, ice buildup, and equipment that was not specified for the local temperature range.
Snow Shedding Strategies and When Not to Clear Panels
Snow management is the single most consequential winter task for a cold-climate solar owner. Panels mounted flush on a steep roof often shed snow on their own once the sun hits them, because the dark glass warms faster than the surrounding roof surface. Arrays on shallow pitches, ground mounts, or roofs with snow guards can hold accumulation for days or weeks. Your first job is to understand which category your system falls into, because the right strategy differs sharply between them.
Before you grab a roof rake, weigh the risks. Climbing onto a snowy roof is dangerous, and scraping or striking panels with metal tools can crack glass, void warranties, and create exactly the microcracks that plague cold-climate arrays. Many manufacturers and safety organizations recommend against DIY clearing altogether. Instead, consider the following approaches, ranked from safest to most involved:
- Let nature and gravity work: On steep pitches (roughly 30 degrees or more), dark panels usually clear themselves within a day or two of sun. Monitor production remotely and resist the urge to intervene.
- Use a soft snow rake from the ground: A long-handled roof rake with a foam or plastic head can pull snow off the lower edge of the array without contacting the glass directly. Work from a stable position and never stand under the slide zone.
- Install snow guards or panel-level barriers: These keep snow from sliding in dangerous sheets and can be specified during installation or retrofitted by a professional.
- Hire a solar professional: For ground mounts, low-slope roofs, or heavy accumulation, a certified installer with proper fall protection is the safest and often most cost-effective option.
Equally important is knowing when to leave the snow alone. Do not clear panels during active snowfall, freezing rain, or when temperatures are so low that ice has bonded to the glass; you risk scratching the anti-reflective coating or cracking cells. Never use a hose to melt snow, since water refreezes in gutters and behind the array. And if your panels are older or already showing signs of wear, any physical contact increases the chance of damage. In many cases, a few lost kilowatt-hours are cheaper than a repair bill, so patience is a legitimate strategy.
For owners who want to monitor conditions without climbing, remote production tracking is invaluable. A sudden drop to zero output on a sunny day usually means snow cover, while partial output suggests partial shading or a string-level issue. Pairing production data with a simple weather log helps you decide whether to act or wait.
Adjusting Tilt Angle for the Low Winter Sun
In northern states, the sun climbs only 20 to 30 degrees above the horizon in December and January, compared with 60 to 70 degrees in June. A fixed array optimized for annual production is usually set at a tilt close to the local latitude, which favors summer and shoulder-season output. In winter, that same angle lets sunlight strike the glass at a glancing angle, reducing the effective capture area and allowing snow to linger longer.
Adjustable-tilt ground mounts and ballasted flat-roof systems offer a straightforward fix: steepen the tilt by 10 to 15 degrees for the winter months. A steeper angle does three things at once. It presents the panel more perpendicular to the low sun, it encourages snow to slide off, and it reduces the chance of ice bridging across the frame. The trade-off is that steeper winter tilts can slightly underperform in summer, so the best approach is seasonal adjustment if your mounting hardware supports it.
For fixed roof mounts, retrofitting tilt is rarely practical, but you can still optimize around the constraint. Trim or relocate shading obstructions such as bare branches, chimney caps, and vent stacks that cast long winter shadows. Check that the array's lower edge sits high enough above the roof plane to avoid snow dams. And if you are planning a new installation, tell your designer you want winter-weighted production; they can model tilt and string configuration against local snow loads and sun angles rather than defaulting to a summer-optimized layout.
Why Freeze-Thaw Microcracks Demand Winter Inspection
Water is relentless. It seeps into hairline gaps in frame seals, junction boxes, and backsheet edges, then expands when it freezes and contracts when it thaws. Repeated cycles widen tiny flaws into microcracks in the silicon cells, and those cracks may not show up as obvious glass breakage. Instead, they manifest as slowly declining output, hot spots, or string-level underperformance that standard monitoring can miss for months.
Cold-climate solar owners should schedule an inspection each fall and again in early spring. A qualified technician can perform electroluminescence imaging or infrared thermography to spot cell cracks and hot spots that are invisible to the eye. They will also check torque on mounting hardware (which loosens with thermal cycling), inspect junction boxes and connectors for moisture intrusion, verify that conduit and cable ties have not become brittle, and confirm that snow guards and flashing remain intact. Catching a cracked cell early usually means replacing a single panel or diode; ignoring it can mean replacing a string or inverter.
Between professional visits, do your own visual checks from the ground. Look for discolored cells, condensation inside the glass, sagging frames, or snow that lingers in the same spot after the rest of the array has cleared, which often signals a cracked panel or a shadow from a new obstruction. Document anything unusual with photos and share them with your installer. If you are evaluating monitoring gear for outbuildings or security cameras that share your off-grid setup, our review of Ring Spotlight Cam Plus solar panel performance covers how small panels behave in low-light winter conditions, which is a useful parallel for understanding accessory solar performance.
It also pays to review your insurance and warranty paperwork before winter. Most panel warranties cover manufacturing defects but exclude damage from improper snow removal, and homeowner policies vary on ice dam and snow load claims. Knowing the rules in advance prevents unpleasant surprises and helps you decide whether to clear snow yourself or call a professional.
Putting It All Together: A Winter Performance Checklist
Optimizing solar panel performance in cold climates is a seasonal discipline rather than a one-time fix. The homeowners who get the most from their arrays treat winter as a maintenance window: they verify equipment ratings, plan snow management, adjust what can be adjusted, and inspect for freeze-thaw damage before it compounds. A simple annual routine covers most of the ground.
- Late fall: Confirm inverter cold-temperature voltage limits, trim shading obstructions, and schedule a professional inspection if it has been more than two years.
- First snow: Verify remote monitoring is working, note which parts of the array shed snow and which do not, and set a rule for when (if ever) you will clear panels.
- Midwinter: Check production against a clear-sky baseline, steepen adjustable tilts if you have them, and watch for ice dams or snow guards that have loosened.
- Early spring: Book a post-winter inspection focused on microcracks, connector moisture, and mounting torque, and compare spring output to the prior year to catch slow declines.
If you are still comparing installation options or want help finding a qualified local professional who understands cold-climate design, resources like ContractorHomeQuotes can connect you with vetted contractors and cost data for home improvement and energy projects. Pairing that with a clear-eyed winter plan keeps your system producing when the grid is stressed and the sun is low.
Cold weather is not the enemy of solar; neglect is. Panels love crisp, clear winter days, and with a little planning around snow, tilt, and inspection, your array can turn the coldest months into some of its most productive. Start with one item on the checklist this season, and build the routine from there.
Learn more about Solar Panel Cleaning for guides, costs, and what to expect.
Compare Solar Panel Cleaning Pros Near You
Enter your ZIP code to compare top-rated local professionals and request free quotes.