
Solar Panel Snow and Hail Protection Strategies That Work
Protect your array from winter storms with smart solar panel snow and hail protection strategies. Call (833)-212-3715 for expert installer quotes today.

By Wendy Keller
Learn more about Solar Panel Installation and Repair for guides, costs, and what to expect.
Compare Solar Panel Installation and Repair Pros Near You

Enter your ZIP code to compare top-rated local professionals and request free quotes.
When a winter storm rolls in, your solar array becomes both a power source and a potential target. Hailstones can crack glass, snow can bury a whole row of panels, and the difference between a quick recovery and a costly repair often comes down to preparation. If you live in Colorado, the Northeast, or any hail-prone corridor, protecting your investment is not optional. It is part of owning a solar system.
The good news is that modern panels are tougher than many homeowners assume, and a few smart habits can dramatically reduce risk. Below, we break down the technical standards that matter, how snow actually behaves on a tilted array, safe clearing methods, insurance questions, and the post-storm checks that catch hidden damage before it becomes a warranty fight.
Hail Rating Standards and What They Mean for Panel Choice
Not all solar panels are built to the same toughness standard. The most common benchmark is the IEC 61215 certification, which includes a hail impact test. In that test, panels are struck by ice balls at a specified speed and diameter. Many standard panels are rated for 25 mm (about 1 inch) hail at roughly 23 meters per second (around 50 mph). Some manufacturers offer panels tested to 35 mm or even 45 mm hail, which is a meaningful upgrade for homeowners in hail alley.
That rating is not a guarantee of invincibility. A 2-inch hailstone driven by 70 mph winds carries far more energy than the lab test simulates. But a higher rating does give you a buffer. When comparing quotes, ask your installer for the hail impact rating in the datasheet and confirm the test standard used. If you live in an area that sees frequent quarter-sized or larger hail, paying a small premium for 35 mm-rated glass is often worth it.
Panel construction also matters. Tempered glass front sheets are standard, but the thickness and tempering process vary. Backsheet durability and frame strength play a role too, because hail can dent frames and compromise the seal. A frame that bends can let moisture into the laminate, which leads to long-term degradation even if the glass survives. Look for panels with robust anodized aluminum frames and a solid warranty that explicitly covers hail damage, not just manufacturing defects.
It is also worth checking whether your chosen panel carries a separate impact resistance rating beyond the basic certification. Some premium manufacturers publish their own hail test results at higher speeds or larger diameters. That data is not marketing fluff; it is a useful signal of build quality. When you request quotes through a service like NewSolarQuotes, ask specifically for hail-rated options and compare the datasheets side by side.
Snow Shedding Behavior by Tilt Angle and Mounting Type
Snow does not pile up evenly on every roof. The angle of your array and the way it is mounted largely determine whether snow slides off on its own or sits there for days. A steep tilt (40 degrees or more) encourages snow to slough off as soon as sun warms the glass or a little wind works under the edge. A shallow tilt (under 20 degrees) lets snow accumulate, especially if it is wet and heavy. In many snowy states, installers recommend a tilt of at least 30 degrees to promote shedding, even if a flatter angle would technically capture more winter sun.
Mounting type matters just as much. Roof-mounted arrays on a pitched roof benefit from gravity and the roof's own slope. Ground-mounted arrays can be set to an optimal winter angle and are easier to clear safely. Ballasted flat-roof systems and low-slope commercial mounts often need manual clearing because snow has nowhere to slide. If you have a flat or low-slope roof, plan for safe access and a clearing routine before the first storm.
Panel spacing and wiring layout also affect snow behavior. Panels mounted flush with the roof tend to hold snow at the bottom edge, where it can freeze into a dam. Racked panels with a few inches of clearance allow some air circulation and melt from below. Microinverters and DC optimizers can help here: if one panel is snow-covered while others are clear, module-level electronics keep the rest of the array producing instead of dragging the whole string down. That does not clear the snow, but it limits the energy loss.
One more factor: snow guards. These small metal or plastic attachments are common on snowy roofs to prevent avalanches over walkways. On a solar array, they can be counterproductive because they hold snow on the panels. Most installers avoid them on the array itself and instead position the array so shedding snow lands in a safe area. Talk through snow shedding with your installer during the design phase; it is much easier to plan for than to retrofit.
Clearing Snow Safely Without Damaging Glass or Wiring
The safest approach to snow on solar panels is often patience. Panels are dark and absorb sunlight, so a thin layer of snow usually melts or slides off within a day or two once the sun returns. Clearing snow is only worth the risk when the accumulation is heavy, wet, and persistent, or when you have a ground-mounted array you can reach safely from the ground.
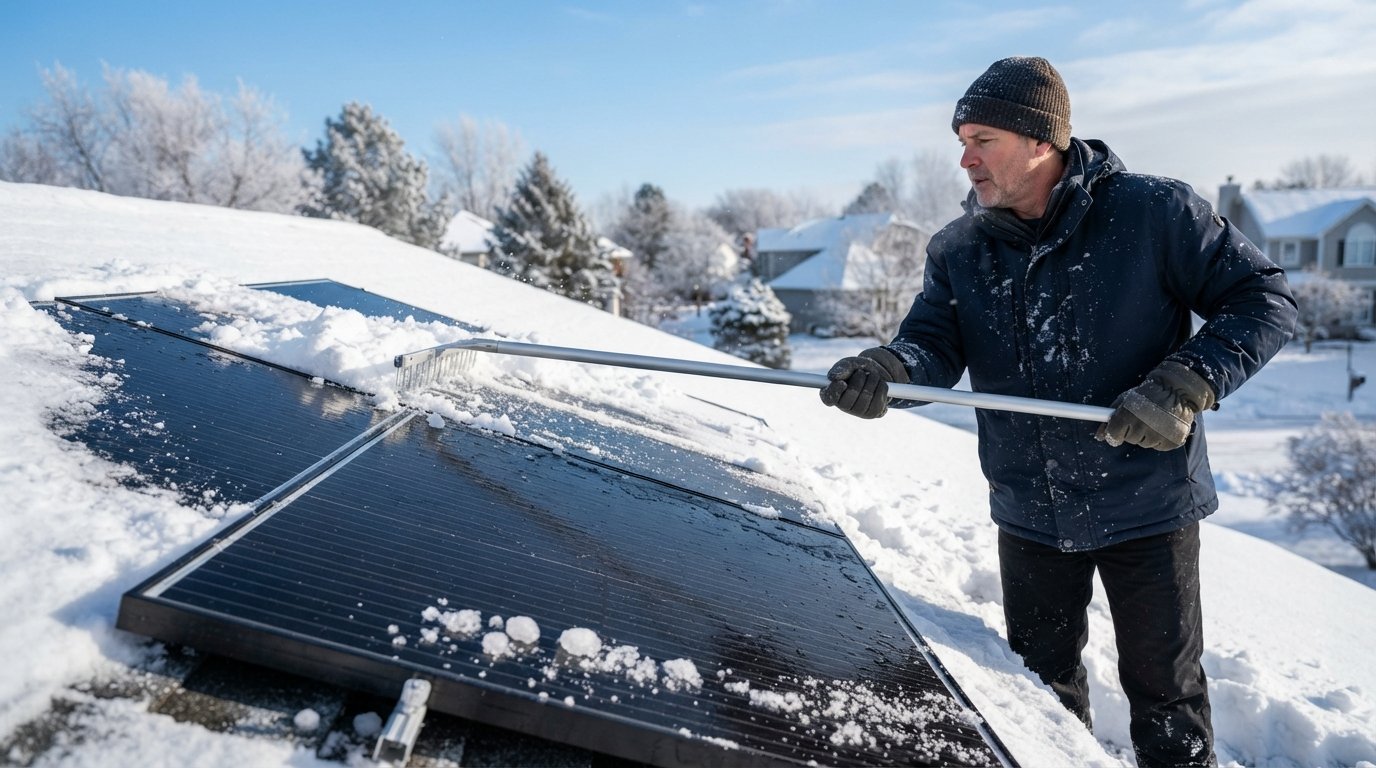
If you do clear snow, follow a conservative routine. Never stand on the roof, never use a metal shovel, and never strike the glass. Use a soft roof rake with an extendable handle, and pull snow down gently from the lower edge rather than pushing it across the surface. Avoid the wiring and junction boxes, and do not chip at ice. A scratch on the glass is a permanent efficiency loss, and a nicked cable is a safety hazard.
Here is a simple safety checklist before you grab a rake:
- Check the weather: avoid clearing during active snow, wind, or freezing rain.
- Stay on the ground: use an extendable soft rake and keep both feet on a stable surface.
- Protect the edges: do not drag the rake across frame corners or conduit.
- Skip ice: never chip or hammer ice; let the sun do the work.
- Know when to call a pro: if snow is deep, the roof is steep, or you see damage, stop and call a certified installer.
After clearing, inspect the array from the ground with binoculars. Look for cracked glass, loose frames, or hanging wires. If anything looks off, turn off the system at the disconnect (if safe to do so) and call a professional. Clearing snow is not worth a fall or an electrical shock, and most homeowners should treat it as a last resort rather than a routine chore.
Insurance Coverage Questions After a Hail Event
Hail damage is often covered under a standard homeowners insurance policy, but the details matter. Most policies cover damage to the roof and attached structures, and solar panels are usually considered part of the structure. However, some insurers require a rider or endorsement for solar equipment, especially ground-mounted systems or leased panels. If your panels are leased or financed through a power purchase agreement, the equipment may be insured by the leasing company, and your responsibility may be limited to the deductible.
After a hail event, document everything before you clean up. Take dated photos of the panels, the roof, and any visible dents or cracks. Note the date and approximate size of the hail. Call your insurer promptly and ask three specific questions: Is the solar array covered as part of the dwelling? Is there a separate deductible for the array? Does the policy cover removal and reinstallation costs if the roof needs repair? The answers vary widely by carrier and state.
Be careful with repair estimates. An insurer may send a general adjuster who has never inspected a solar array. Ask for an adjuster with solar experience, or hire an independent inspector to document the damage. Microcracks and seal failures may not be visible from the ground, so a professional IV curve trace or electroluminescence test can reveal damage that a visual inspection misses. That documentation strengthens your claim and helps you avoid a dispute later.
If your system was installed by a certified professional, check whether the installer offers a workmanship warranty that covers removal and reinstallation during roof repairs. Many solar warranties cover the equipment but not the labor to take it off and put it back. Knowing that ahead of time prevents surprise costs. For a broader look at whether solar pays off in your situation, see our guide on whether solar panels are worth it.
Monitoring Checks After a Storm to Catch Microcracks
Microcracks are the quiet threat after a hail event. They are hairline fractures in the silicon cells that do not break the glass but do interrupt current flow. A panel with microcracks can still produce power, just less of it, and the damage often worsens over time as thermal cycling widens the cracks. You will not see them from the ground, and you may not notice the output drop right away.
The first line of defense is your monitoring platform. Most modern systems report production per panel or per string. After a storm, compare daily and weekly output to the same period in prior years, adjusting for weather and season. A sudden 5 to 15 percent drop on one section of the array is a red flag. If you have module-level monitoring, check for any panels that are underperforming relative to their neighbors.
If the numbers look suspicious, schedule a professional inspection. An installer can perform an IV curve trace, which measures the panel's current-voltage behavior and reveals subtle degradation. Thermal imaging can also spot hot spots caused by cracked cells. These tests are quick and relatively inexpensive, and they give you concrete evidence for a warranty claim or insurance filing. Do not rely on a visual check alone; microcracks are often invisible to the naked eye.
Keep a simple log of storms, output data, and inspections. If you ever need to file a claim or pursue a warranty repair, that record is invaluable. It also helps you spot long-term trends, like a slow decline that suggests cumulative hail damage rather than a single event. For homeowners planning a move or a roof replacement, coordinating solar removal and reinstallation with a reputable relocation resource can save time and prevent damage; see Moving.Homes for planning guides and professional moving support.
Building a Year-Round Protection Plan
The best snow and hail protection strategy is proactive, not reactive. Start with panel selection: choose a model with a strong hail rating and a warranty that covers impact damage. Next, design the array with snow shedding in mind, using an appropriate tilt and avoiding snow guards on the panels themselves. Then set up monitoring so you can catch performance drops early, and keep a soft roof rake on hand for light, safe clearing when needed.
Review your insurance policy every year, especially if you add a battery or expand the array. Confirm that the solar equipment is covered and that your deductible is manageable. If you live in a hail-prone state, ask about a separate hail deductible or a rider that covers the array specifically. These conversations take ten minutes and can save thousands.
Finally, build a relationship with a certified installer before you need one. A local pro can inspect the array after major storms, perform IV curve traces, and handle any warranty paperwork. If you do not have an installer yet, request quotes from vetted professionals in your area and ask about their storm response and inspection services. A little planning now means your panels keep producing through the worst weather, and you avoid the stress of discovering damage after it has already cost you weeks of production.