
Solar Inspection Before Activation: What to Expect
A passed solar inspection is your ticket to activation. Call (833)-212-3715 to connect with certified pros and avoid delays.

By Alexia Mabel
Learn more about Solar Panel Installation and Repair for guides, costs, and what to expect.
Compare Solar Panel Installation and Repair Pros Near You

Enter your ZIP code to compare top-rated local professionals and request free quotes.
Your solar panels are mounted, the inverter is humming, and the wiring is complete. Yet the system sits idle, waiting for a critical step that many homeowners underestimate: the pre-activation inspection. This process, often called the solar inspection before activation, determines whether your system is safe, code-compliant, and ready to connect to the grid. Without a passing inspection, you cannot legally turn on your solar array or start saving on electricity. Understanding what happens during this phase helps you prepare, avoid delays, and ensure a smooth switch to solar power.
The Inspection Process: From Installation to Permission to Operate
After your installer finishes the physical installation, the system enters a verification phase that involves multiple parties: your local building department, your utility company, and sometimes a third-party inspector hired by your lender or installer. The goal is to confirm that the system meets electrical codes, structural standards, and utility interconnection requirements. This phase typically begins with the installer submitting permit applications and ends with the utility granting Permission to Operate (PTO), the official green light to activate your system.
The timeline varies by jurisdiction, but most homeowners can expect two to six weeks between installation and activation. Factors such as inspection backlogs, utility processing times, and any required corrections can extend this period. Knowing the sequence of events helps you set realistic expectations and follow up proactively. For a broader overview of the entire inspection journey, including what inspectors look for and how to prepare, see this solar inspection guide.
Local Building and Electrical Inspection
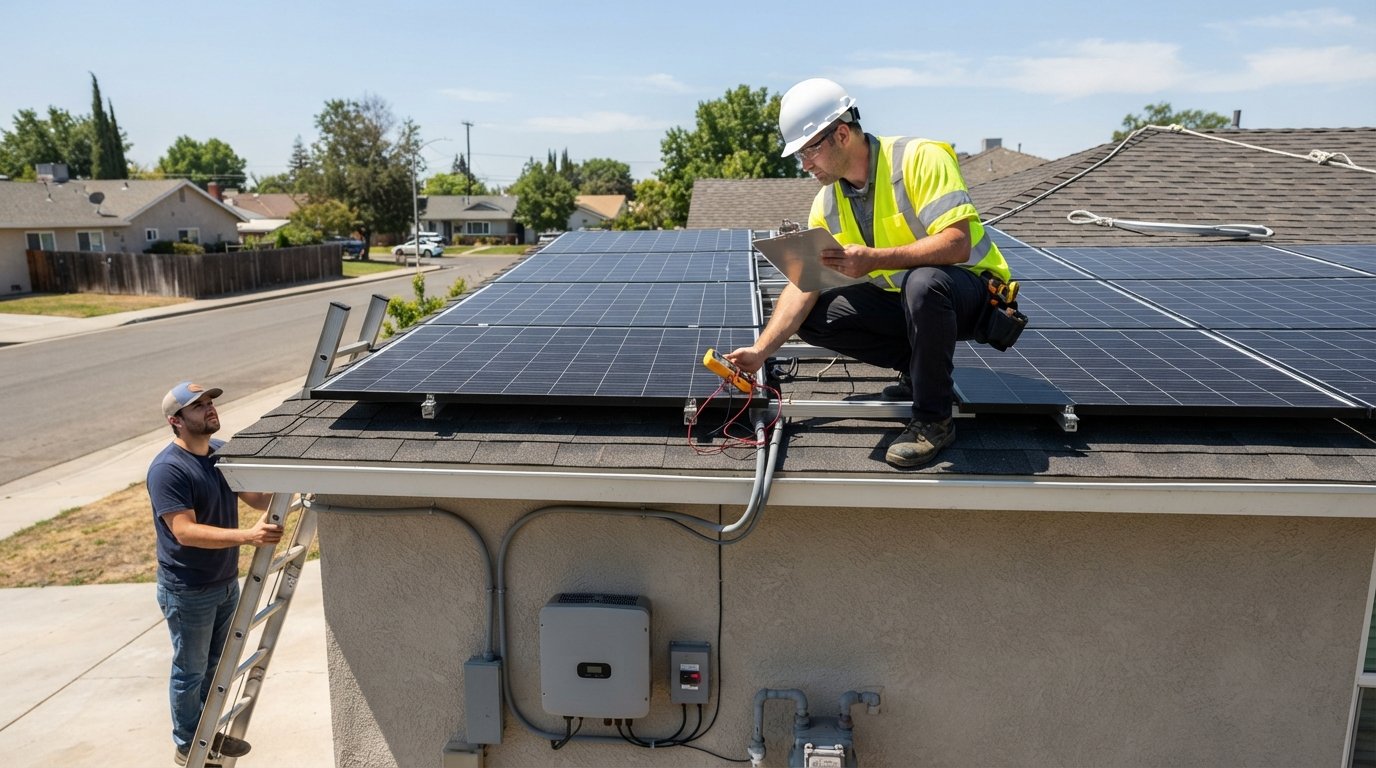
The first major checkpoint is the local building and electrical inspection. A municipal inspector, often from the building department, visits your property to verify that the installation complies with the National Electrical Code (NEC) and local amendments. This inspection covers both the structural integrity of the mounting system and the electrical safety of the components. The inspector will check that the panels are securely attached to your roof, that the wiring is properly sized and protected, and that disconnects and grounding are in place.
Electrical inspections focus on several key areas. The inspector verifies that the inverter is listed and labeled, that DC and AC disconnects are accessible and clearly marked, and that rapid shutdown requirements are met. They also check conduit runs, junction boxes, and terminations for proper workmanship. Any exposed wiring, missing labels, or improper grounding can result in a failed inspection and a requirement to correct the issues before re-inspection.
Structural checks are equally important. The inspector confirms that roof penetrations are sealed, that mounting hardware is compatible with your roofing material, and that the system does not compromise the structural integrity of your home. In some areas, a separate structural engineer's letter may be required, especially for older roofs or complex installations.
Utility Interconnection Review
While the local inspection addresses code compliance, the utility company conducts its own review to ensure that your system can safely connect to the grid. This process, known as interconnection review, examines the system's impact on the grid and verifies that your equipment meets utility standards. The utility may require a separate application, sometimes called an interconnection agreement, which your installer typically handles.
The utility review focuses on the inverter's anti-islanding capabilities, which prevent your system from feeding power into the grid during an outage. They also check that the system size is within the approved limits for your service panel and that net metering arrangements are in place. In some cases, the utility may require a new meter or a meter upgrade to accommodate bidirectional power flow. This meter swap is often the final step before activation.
The timing of the meter swap varies. Some utilities install the new meter immediately after the local inspection passes, while others wait until all paperwork is processed. In rare cases, the utility may perform its own inspection or require a witness test. Understanding your utility's specific procedures helps you anticipate delays and follow up if necessary.
Common Code Issues That Delay Permission to Operate
Even experienced installers can encounter code issues that delay the inspection and PTO. Being aware of these common pitfalls helps you ask the right questions and ensure your installer addresses them proactively. The most frequent problems involve labeling, clearances, and grounding.
Labeling is a surprisingly common source of failed inspections. The NEC requires specific labels for disconnects, rapid shutdown devices, and power sources. Missing or illegible labels can result in a correction notice. Similarly, clearances around electrical equipment must meet code requirements; inspectors need adequate working space around inverters, disconnects, and panels. If your installer placed equipment too close to a wall or obstructed access, the inspector may require relocation.
Grounding and bonding issues also cause delays. The system must be properly grounded to prevent electrical hazards, and all metal components must be bonded. Inspectors check for proper grounding electrode conductors, bonding jumpers, and connections. In some cases, the existing home grounding system may need upgrades to accommodate the solar installation.
Another common issue is the use of listed and labeled equipment. All components must be certified for their intended use. Using unlisted equipment or mixing components in ways not approved by the manufacturer can lead to rejection. Your installer should provide documentation for all major components, including inverters, combiner boxes, and rapid shutdown devices.
To minimize the risk of delays, review the inspection checklist with your installer before the inspection. Ask whether all labels are in place, whether clearances meet code, and whether the grounding system has been verified. A proactive approach can save weeks of waiting.
Preparing for the Inspection: A Homeowner Checklist
While your installer is responsible for code compliance, homeowners play a role in ensuring a smooth inspection. The inspector needs access to your property, your electrical panel, and the attic or roof areas where equipment is installed. Preparing for the visit can prevent unnecessary delays and demonstrate that you are engaged in the process.
Before the inspector arrives, complete the following checklist to facilitate access and safety:
- Clear access to the electrical panel, inverter, and any disconnects. Remove stored items, furniture, or debris that might block the inspector's path.
- Ensure pets are secured. Inspectors may need to move between indoor and outdoor areas, and loose animals can create safety concerns.
- Provide gate codes or keys if your property has locked gates. Confirm that the inspector can access the roof or attic if required.
- Have documentation ready. Although the inspector may not ask for it, having copies of permits, equipment specifications, and the installer's contact information on hand can be helpful.
- Confirm the inspection appointment. Verify the date and time with your installer and ensure someone is home to provide access.
Beyond access, homeowners should also address any obvious issues that could distract the inspector. For example, if your roof has damaged shingles near the mounting points, consider having them repaired before the inspection. Similarly, if the installer left debris or packaging materials around the work area, clean it up. A tidy job site reflects professionalism and reduces the chance of unrelated concerns being raised.
Finally, communicate with your installer about any questions or concerns you have before the inspection. If you notice something that seems off, such as exposed wiring or missing labels, report it immediately. It is better to address issues before the inspector arrives than to face a correction notice.
What to Do If the Inspection Fails
A failed inspection is not the end of the road, but it does require prompt action. When an inspector identifies code violations or deficiencies, they issue a correction notice detailing the items that must be fixed. Your installer is typically responsible for making these corrections, but as the homeowner, you should stay informed and ensure the process moves forward.
The first step is to review the correction notice with your installer. Understand exactly what the inspector flagged and what is required to resolve it. In many cases, the fixes are minor, such as adding a label or adjusting a disconnect. However, some issues may require more significant work, such as relocating equipment or upgrading grounding.
Once the corrections are made, your installer will schedule a re-inspection. Depending on your jurisdiction, this may involve a new inspection fee and additional waiting time. To avoid further delays, confirm that all corrections have been completed and documented before the re-inspection. Your installer should provide photos or other evidence of the fixes.
If the failure was due to something outside your installer's control, such as a utility requirement or a structural issue with your home, you may need to coordinate with other parties. For example, if the utility requires a meter upgrade, you may need to schedule that with them directly. Stay in close communication with your installer and utility to ensure everyone is on the same page.
In rare cases, repeated inspection failures may indicate a deeper problem with the installer's workmanship. If you have concerns about your installer's competence or responsiveness, consider escalating the issue. Your state's licensing board or consumer protection agency can provide guidance. Remember that the inspection process exists to protect you, so take any failures seriously and ensure they are resolved correctly.
After the Inspection: Meter Swap and Activation
Once the local inspection passes and the utility approves the interconnection, the final step is the meter swap. Your utility will replace your existing meter with a bidirectional meter that can measure both the electricity you consume and the excess you send back to the grid. This swap is usually quick, but scheduling can take time depending on the utility's workload.
After the meter swap, the utility issues Permission to Operate (PTO). This document authorizes you to turn on your system and begin generating solar electricity. Your installer will typically handle the final activation, which involves turning on the inverter and verifying that the system is producing power. You may receive a monitoring login to track your system's performance.
It is important not to activate your system before receiving PTO. Doing so violates your interconnection agreement and could result in penalties or safety hazards. Once PTO is granted, you can enjoy the benefits of solar: lower electricity bills, reduced carbon footprint, and increased energy independence. Keep in mind that the first utility bill after activation may still reflect pre-solar usage, so allow a full billing cycle to see the impact.
For homeowners planning to move soon after installation, the pre-activation inspection and PTO are critical for transferring the system to new owners. If you are relocating, resources like Moving.Homes offer practical guidance on managing utilities and home systems during a move, ensuring a smooth transition for solar-equipped properties.
The solar inspection before activation is a vital quality control step that protects your investment and ensures a safe, reliable system. By understanding the process, preparing your home, and staying engaged, you can help ensure a timely activation and start reaping the rewards of clean energy.