
Solar Panel Upgrade Options for Older Systems
Compare solar panel upgrade options for older systems, from inverter swaps to full reinstalls. Call (833)-212-3715 for expert guidance.

By Alexia Mabel
Learn more about Solar Panel Installation and Repair for guides, costs, and what to expect.
Compare Solar Panel Installation and Repair Pros Near You

Enter your ZIP code to compare top-rated local professionals and request free quotes.
Your solar panels have been quietly working on your roof for a decade or more, but lately the electric bill has started creeping up again, or the monitoring app shows a flat line on cloudy days. You are not imagining it: solar equipment ages, and the system that was state-of-the-art in 2012 may now be the weakest link in your home energy strategy. The good news is that you have more choices than a full rip-and-replace. From swapping a tired inverter to adding panels around legacy hardware, the right move depends on what is failing, what is still under warranty, and what incentives are on the table. This guide walks through the practical upgrade paths for older solar systems, including how to spot the warning signs, what compatibility headaches to expect, and how to compare repair, partial replacement, and full reinstall costs before you spend a dime.
Signs Your Older Solar System Needs an Upgrade
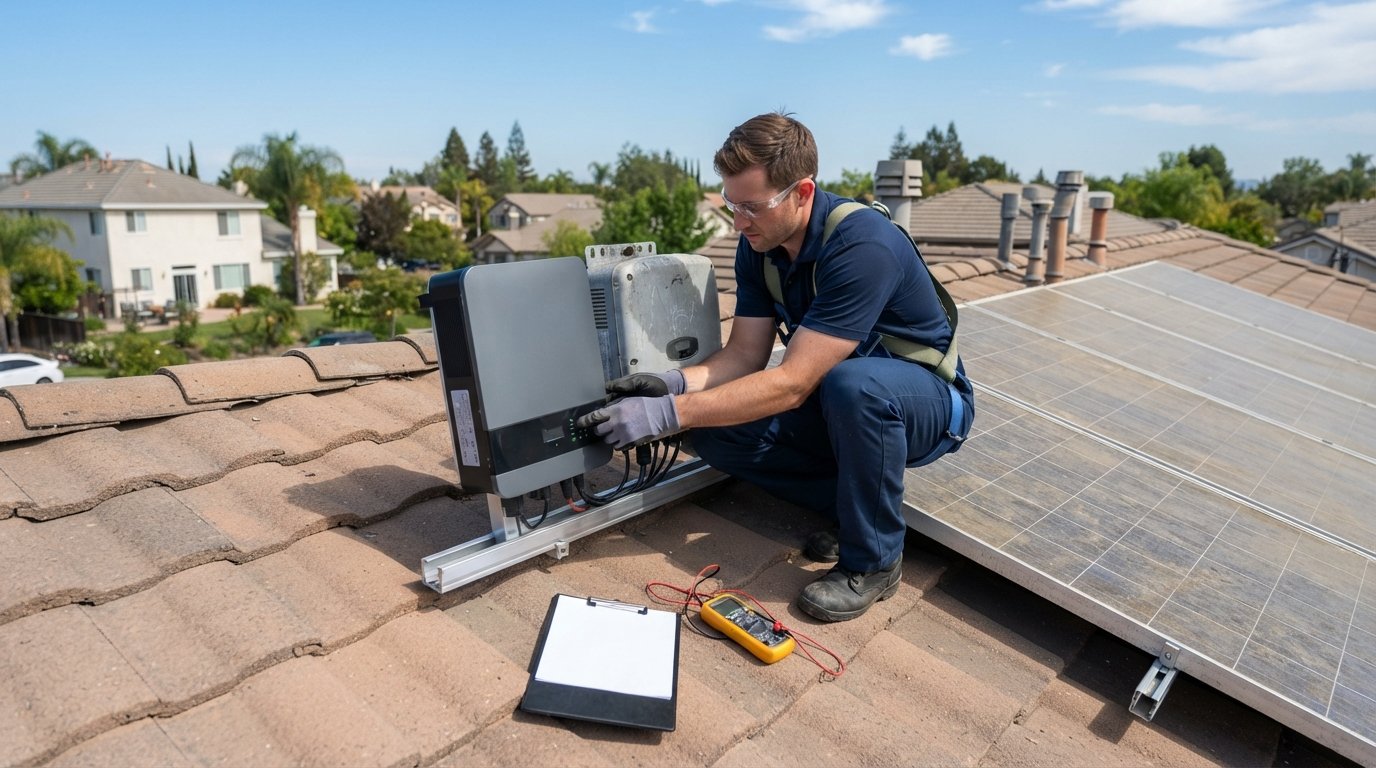
Solar panels themselves are remarkably durable, with most manufacturers warrantying power output for 25 years. Inverters, however, typically last 10 to 15 years, and that is usually the first component to fail. If your system was installed before 2015, there is a strong chance the original inverter is either out of warranty or approaching the end of its service life. A failing inverter often shows up as a sudden drop in production, frequent error codes, or a monitoring portal that stops reporting altogether. Because the inverter is the brain of the system, its decline can make an otherwise healthy array look like a dud.
Panel degradation is slower but real. Most panels lose about 0.5 percent of their output per year, so a 12-year-old array may be producing 5 to 7 percent less than it did on day one. That alone rarely justifies replacement, but if you see physical damage such as cracked glass, delamination, hot spots, or snail trails, the affected panels should be evaluated. Older panels also used older cell technology with lower efficiency, so replacing a few damaged units with modern modules can sometimes boost output more than expected, provided the rest of the system can handle the mismatch.
Other warning signs are less about hardware and more about the surrounding infrastructure. If your system uses a central string inverter and one panel is shaded, the entire string underperforms. If your roof has been re-shingled or is due for replacement, removing and reinstalling the array adds cost that should factor into any upgrade decision. And if your original installation predates rapid shutdown requirements or modern grounding standards, an upgrade is an opportunity to bring the system up to current electrical code, which matters for insurance and future resale. For a deeper look at diagnosing these issues, see our guide on troubleshooting common solar panel system issues.
Compatibility Issues When Adding Panels to a Legacy System
One of the most common questions from homeowners is whether they can simply add a few panels to an existing array to cover a new electric vehicle or a home addition. The answer is sometimes yes, but the obstacles are technical and often underestimated. The first constraint is the inverter. Most string inverters are sized to a specific DC-to-AC ratio, and adding panels beyond that ratio can void the warranty or cause clipping losses. If your inverter is already maxed out, you will need either a larger inverter or a second, separate system with its own inverter.
The second constraint is module mismatch. Older panels have different voltage and current characteristics than modern ones. Mixing a 250-watt panel from 2010 with a 400-watt panel from 2026 on the same string can drag down the performance of the new panel or confuse the maximum power point tracking. In many cases, installers will recommend adding new panels on a separate string with its own inverter or microinverters, effectively creating a hybrid system. That approach works, but it adds balance-of-system costs and may complicate monitoring.
The third constraint is electrical capacity. Your main service panel, busbar rating, and the original permit documents determine how much additional solar you can connect under the 120 percent rule in the National Electrical Code. Older homes with 100-amp service may need a panel upgrade before any expansion is possible. Before committing to an add-on, a qualified installer should review your existing interconnection agreement with the utility, because some legacy net metering programs cap system size or change compensation rates when you modify the array. The following checklist captures the main compatibility questions to resolve early:
- Is the existing inverter still under warranty, and does it have spare capacity for additional DC input?
- Do the new panels match the voltage and current range of the existing strings, or will they need a separate inverter?
- Does the main electrical panel have enough busbar capacity for the added solar?
- Will adding panels change your utility net metering tier or reset your compensation rate?
- Are the roof mounting rails and flashing compatible with the new panel frame dimensions?
If several of these answers are unfavorable, a partial replacement, such as upgrading the inverter and adding a small separate array, often makes more sense than forcing new panels onto old electronics. The key is to model the production and cost of each option rather than assuming that more panels always equal more savings.
Incentive Eligibility: Upgrades Versus New Installs
The federal residential clean energy credit, often called the solar investment tax credit, currently covers 30 percent of qualifying solar costs through 2032. The credit applies to upgrades as well as new installations, but the rules are specific. Equipment must be new and used for the first time, and it must be installed on a home that serves as your primary or secondary residence. Repairing a broken inverter generally does not qualify, but replacing it with a new inverter does, provided the inverter is part of a qualifying solar electric system. Adding panels to an existing array can also qualify for the credit on the added cost, but only the new equipment and associated labor count, not the entire original system.
State and utility incentives add another layer. Some states offer rebates for battery storage or for upgrading to certain inverter technologies, while others have performance-based incentives that pay per kilowatt-hour of production. If you are adding panels, check whether your utility's net metering program has a system size cap or a successor tariff that applies to modified systems. In some cases, upgrading a legacy system can move you from a generous old net metering plan to a less favorable new one, which is a hidden cost that should be modeled carefully. Conversely, if your current inverter is failing and you are considering battery storage, upgrading to a storage-ready inverter now may unlock future incentives and avoid a second replacement later.
It is also worth checking local property tax rules. Many states offer property tax exemptions for solar additions, but the exemption language sometimes distinguishes between new installations and upgrades. A quick call to your county assessor can clarify whether an upgrade will trigger a reassessment. Because incentives vary by location and change frequently, always verify current programs with your state energy office and your utility before signing a contract. A qualified installer can usually provide a personalized incentive summary as part of a quote.
Cost Comparison: Repair, Partial Replacement, and Full Reinstall
When an older system underperforms, the first decision is whether to repair, partially replace, or start over. Repair is almost always the cheapest upfront option, but it only makes sense if the failure is isolated and the rest of the system has meaningful life left. A typical inverter replacement on a residential system might cost between $1,500 and $3,500 installed, depending on the inverter type and labor. Replacing a few damaged panels could run $500 to $1,500 per panel including labor, though matching older panel models can be difficult and sometimes impossible. If your system is 15 years old and the inverter has failed, a repair may buy you five more years, but you may soon face another failure.
Partial replacement usually means upgrading the inverter while keeping the existing panels, or adding a small separate array with its own inverter. This middle path often delivers the best value for systems with healthy panels and a failed inverter. A new string inverter or a set of microinverters can improve monitoring, increase safety with rapid shutdown, and extend the useful life of the array by a decade or more. Costs vary widely, but a typical inverter upgrade with monitoring might range from $2,500 to $5,000 installed. If you add a new sub-array, expect to pay full installation costs for that portion, typically $2 to $3 per watt before incentives.
Full reinstall, meaning removing the old system and installing a new one, is the most expensive option, often $15,000 to $30,000 before incentives for a typical residential system. It makes sense when the roof needs replacement, when the panels are physically damaged or severely degraded, or when the existing system is so old that parts are obsolete and safety standards have changed significantly. A full reinstall also gives you the chance to optimize panel layout, increase system size, and integrate battery storage from the start. The following table summarizes the trade-offs to help you frame the decision:
- Repair: Lowest upfront cost, fastest fix, but short-term solution if the system is near end of life.
- Partial replacement: Moderate cost, extends system life, improves monitoring and safety, best for healthy panels with a failed inverter.
- Full reinstall: Highest cost, maximizes production and warranty, ideal when roof work or obsolete equipment forces a reset.
To compare options fairly, ask installers to model 25-year savings and payback for each scenario using your actual utility rates and expected production. A system that costs more upfront but produces significantly more over time can be the better financial choice, especially if you plan to stay in the home. If you are also planning a move, keep in mind that solar adds resale value, and documented upgrades can make the home more attractive to buyers. For homeowners coordinating a solar upgrade with a relocation, resources like Moving.Homes offer checklists and practical guidance that can help you time the project and transfer system documentation smoothly.
Decommissioning and Recycling Removed Equipment
Any upgrade that removes panels or inverters creates a waste stream that needs to be handled responsibly. Solar panels contain glass, aluminum, silicon, and small amounts of metals, and while they are not classified as hazardous waste in most states, they should not go to a standard landfill if recycling is available. A growing number of recycling facilities accept panels, and some installers include removal and recycling in their quotes. In the United States, recycling infrastructure for solar is still developing, but programs exist through manufacturers, distributors, and specialized recyclers. Expect to pay a per-panel fee for recycling, often $10 to $30 per panel, though some installers absorb this cost as part of the project.
Inverters and batteries require separate handling. Inverters contain electronic components and sometimes small amounts of hazardous materials, so they should go to an e-waste recycler. If you are replacing a battery, lithium-ion units should be recycled through a certified facility, and some manufacturers offer take-back programs. Before removing any equipment, ask your installer for a decommissioning plan that specifies who handles removal, transportation, and recycling, and get the recycling certificates if you want documentation for your records. Proper disposal is not just an environmental issue; it also protects you from liability if the equipment ends up in the wrong waste stream.
Finally, remember to update your homeowner's insurance policy and your utility interconnection agreement after any major upgrade. Insurers may want proof that the new equipment meets current electrical codes, and the utility needs to approve any change in system size or inverter type. Keeping the paperwork organized will save you time if you sell the home or file a claim. With a clear understanding of your options and their costs, you can make an informed decision that maximizes the value of your solar investment for years to come.
Learn more about Solar Panel Installation and Repair for guides, costs, and what to expect.
Compare Solar Panel Installation and Repair Pros Near You
Enter your ZIP code to compare top-rated local professionals and request free quotes.