
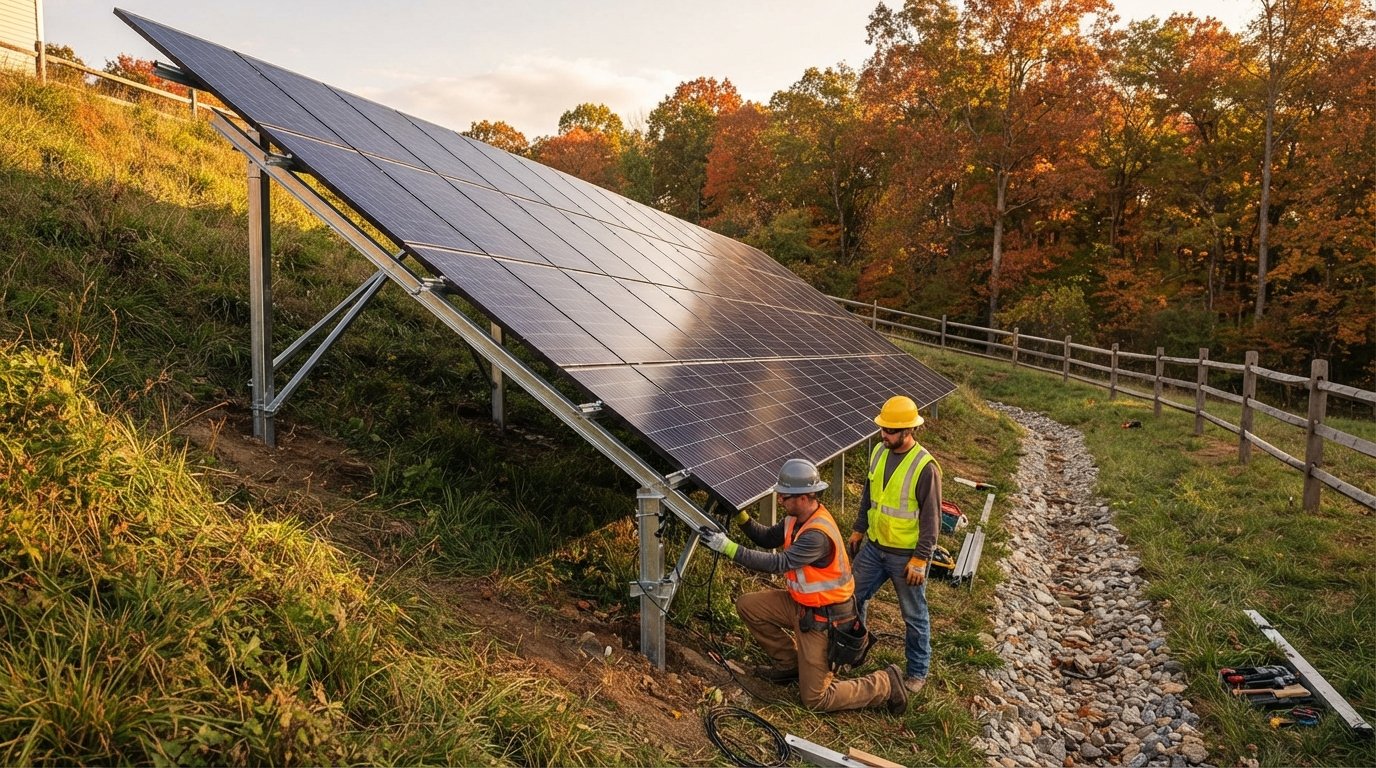
Ground Mounted Solar Array Design for Sloped Yards
Ground mounted solar array design for sloped yards turns awkward hillsides into productive energy sites with the right racking, foundations, and tilt strategy.

By Alex Carter
Learn more about Solar Panel Installation and Repair for guides, costs, and what to expect.
Compare Solar Panel Installation and Repair Pros Near You

Enter your ZIP code to compare top-rated local professionals and request free quotes.
A sloped yard often gets written off as unusable for solar, but that assumption costs homeowners real money. While a steep grade complicates the math, it also opens design options that flat lots cannot match: rear tilt angles that boost winter production, natural drainage that protects equipment, and racking layouts that turn an awkward hillside into a long term energy asset. The key is understanding how slope interacts with racking, foundations, shading, and code before a single post hole is dug.
Why Slope Changes the Design Conversation
On flat ground, a ground mounted array is mostly a math problem: pick a tilt, space the rows to avoid inter row shading, and pour concrete. A sloped yard adds a third dimension to every decision. The grade angle combines with the panel tilt angle, and that combined geometry drives racking height, foundation depth, and wind exposure. A 15 degree hill with a 25 degree panel tilt does not behave like a 40 degree array on flat ground, even though the numbers look similar on paper.
Slope also changes how water moves. A well designed rack redirects stormwater instead of damming it, which matters because ponding at the base of posts accelerates corrosion and can undermine footings over time. On steeper sites, erosion control becomes part of the solar plan, not a separate landscaping afterthought.
Finally, slope affects access. Crews need safe footing during installation, and homeowners need a clear path for cleaning and inverter maintenance for the next 25 years. A design that ignores access will eventually cost more in service calls than it saved in racking hardware. If you want to visualize tilt and spacing before committing, a solar panel design tool can help you test layouts against your actual grade.
Reading Your Slope Before You Design
Every good ground mount project starts with measurement, not guesswork. Slope is expressed as a percentage (rise over run) or in degrees, and the difference matters. A 10 percent grade feels gentle underfoot but still requires adjusted post lengths. A 25 percent grade (about 14 degrees) is where racking design starts to get interesting. Anything above 30 percent usually pushes you toward ballasted or helical systems rather than simple poured footings.
You can estimate grade with a level and a straight board, or with a phone inclinometer app for a rough read. For a permit ready design, a surveyor or installer will take elevation readings at each planned post location. Those readings feed directly into post length calculations so the rail line stays level even when the ground does not.
Three site factors deserve equal attention alongside grade:
- Shading: trees, chimneys, and future growth on the downhill side can block low angle winter sun.
- Soil and drainage: clay holds water, sand drains fast, and both change footing design.
- Wind exposure: ridge tops and open slopes see higher wind speeds than sheltered valleys.
Documenting these conditions early prevents the most expensive mistake in sloped yard solar: discovering after installation that a seasonal shadow or a soggy footer was never accounted for. A short site diary with photos taken at 9 a.m., noon, and 3 p.m. across a few months tells you more than any single site visit.
Racking Strategies That Work on Grade
The racking system is where slope design is won or lost. There are three broad approaches, and each fits a different grade range and budget.
Top of pole mounts place one or two posts at the high point and cantilever the array outward. They handle steep grades well because the foundation sits in the most stable ground, but they concentrate loads and typically limit you to smaller arrays. Driven or helical pile systems screw into the soil at varying depths to reach consistent bearing strata, which makes them a favorite on uneven terrain where digging trenches is impractical. Concrete ballasted or poured footing systems work best on gentler grades where a trencher can reach each post location and the soil can support a conventional footer.
Whichever family you choose, the design principle is the same: keep the rail plane level even though the ground is not. Posts extend or shorten to meet the rails, and the array itself does not follow the hill. This keeps panel tilt consistent across the whole system, which simplifies production modeling and keeps the visual line clean.
Row spacing deserves special attention on slopes. Because the downhill row sits lower, it can shade the row behind it sooner in the morning and later in the afternoon than flat ground spacing tables predict. Designers typically add 10 to 20 percent to standard row spacing on grades above 10 percent, then verify with shading software before finalizing.
Foundations, Drainage, and Wind Loads
Foundations on sloped ground carry two jobs: hold the array down and keep water away from it. On a hillside, water concentrates along the fall line, so posts placed in natural drainage paths need either diversion or deeper embedment. A common approach is a shallow swale or French drain above the array that intercepts surface flow before it reaches the footings.
Wind loading is the other half of the equation. Sloped sites often sit on ridges or open exposures where design wind speeds run higher than the surrounding neighborhood. Local building codes specify the wind speed your structure must withstand, and the racking manufacturer provides engineering tables that translate that speed into footing size, embedment depth, and hardware spacing. Skipping the manufacturer tables and copying a neighbor's design is one of the fastest ways to fail an inspection.
Frost depth matters in cold climates. Footings must extend below the frost line, which can push post lengths well beyond what the visible grade suggests. In warm climates, expansive clay soils create a similar problem in reverse, and helical piles or over excavated footings are often the practical answer.
Permitting ties all of this together. Most jurisdictions require a structural plan stamped by an engineer for ground mounts, and sloped sites frequently trigger additional erosion control or grading permits. Budget time for that paperwork; it is rarely the bottleneck people expect, but it is never instant.
Orientation, Tilt, and Production on a Hillside
Slope gives you a free tilt adjustment, and smart designers use it. On a south facing hill, the natural grade can supplement panel tilt so you reach optimal winter angle with shorter posts. On a north facing slope, the grade works against you, and you may need taller rear legs or a different array location entirely. East and west facing slopes shift production toward morning or afternoon, which can actually pair well with time of use rates that reward late afternoon generation.
The practical rule is to optimize for the whole year, not the best month. A tilt that maximizes June output often underperforms in December when the sun sits low. Modeling tools let you compare annual production across several tilt options and pick the one that matches your utility's rate structure. If your utility pays more for afternoon power, a slightly west tilted array on an east facing slope may beat a perfectly south facing array on paper.
Do not forget the non energy factors. Aesthetics, lawn access, and future landscaping all influence where the array should sit. A hillside array that blocks the view from the kitchen or cuts off the sledding hill will generate regret along with kWh. Walk the site at different times of day and imagine each season before locking the layout.
Ground Mount vs Roof Mount on Sloped Properties
Homeowners with sloped yards sometimes assume a ground mount is automatically harder, but the comparison is not that simple. A roof mount avoids foundation work and keeps the yard untouched, but it inherits the roof's orientation, age, and structural limits. If your roof faces the wrong way or needs replacement within a decade, a ground mount on the slope can be the better long term decision.
Ground mounts also win on serviceability. Panels at waist height are easier to clean, inspect, and repair than panels on a steep roof, and there is no risk of voiding a roof warranty. They can also be sized larger than the roof allows, which matters if you plan to add an electric vehicle or heat pump later.
The tradeoffs run the other way too. Ground mounts need more land, more permitting, and more wiring trenching, and they are more visible. On a small sloped lot, a roof mount may simply be the only practical option. The right answer depends on your specific roof, grade, and energy goals, and comparing quotes from installers who handle both types is the fastest way to see which one pencils out.
Cost Factors Specific to Sloped Sites
Sloped yard solar generally costs more than flat ground solar, but the premium is often smaller than homeowners fear. The main drivers are foundation complexity, post length, trenching difficulty, and engineering requirements. A gentle 5 percent grade may add almost nothing. A 25 percent grade with rocky soil can add several thousand dollars to a typical residential array.
It helps to think in terms of categories rather than a single number:
- Site work: grading, drainage, and access improvements before installation.
- Foundation: deeper or specialized footings, helical piles, or engineered ballast.
- Racking: taller posts, additional bracing, and custom rail cuts.
- Electrical: longer conduit runs and sometimes a remote disconnect.
- Permitting: engineering stamps and erosion control plans.
Federal incentives like the residential clean energy credit still apply to ground mounted systems that serve a home, which softens the premium considerably. State and utility rebates vary, and some programs treat ground mounts differently than roof mounts, so verify the rules before you finalize a design. A platform like SolarEnergy.ai can help you research current incentive programs and connect with installers who understand sloped site economics.
Installation Sequence for a Sloped Yard
Once the design is stamped and permits are in hand, installation follows a predictable rhythm. The order matters because each step depends on the one before it.
- Stake out post locations using the elevation plan, not just tape measurements.
- Install foundations first, then let concrete cure fully before loading.
- Set posts and rails to a level plane, checking with a laser or string line.
- Mount panels and torque hardware to manufacturer specifications.
- Run conduit and wiring, then commission the inverter and monitoring.
Inspection typically happens after foundations and again after electrical work, so build those pauses into the schedule. Most residential ground mounts take one to three weeks of active work, plus permitting and utility interconnection time that can stretch to several months in busy markets.
After commissioning, the maintenance routine is simple: visual inspections after storms, occasional panel cleaning, and an annual check of torque and drainage. Keeping a small log of production data helps you spot underperformance early, when it is still cheap to fix.
Mistakes to Avoid on Sloped Ground
The most common failure is treating a sloped site like a flat one with taller posts. That shortcut ignores how grade amplifies wind exposure, concentrates water, and shifts shading patterns. The second most common mistake is under spacing rows, which looks fine at installation and underperforms every winter for 25 years.
Other pitfalls worth naming: skipping a geotechnical review on questionable soil, burying conduit too shallow on a graded slope, and forgetting that landscaping or tree growth can change the shade profile over time. Each of these is cheap to prevent during design and expensive to correct after the fact.
Sloped yards are not a barrier to solar. They are a design constraint, and constraints produce better engineering when they are respected. Measure the grade, model the shade, engineer the foundations, and let the slope work for you instead of against you. Homeowners who take that approach end up with arrays that produce reliably for decades, on ground that would otherwise sit idle.