
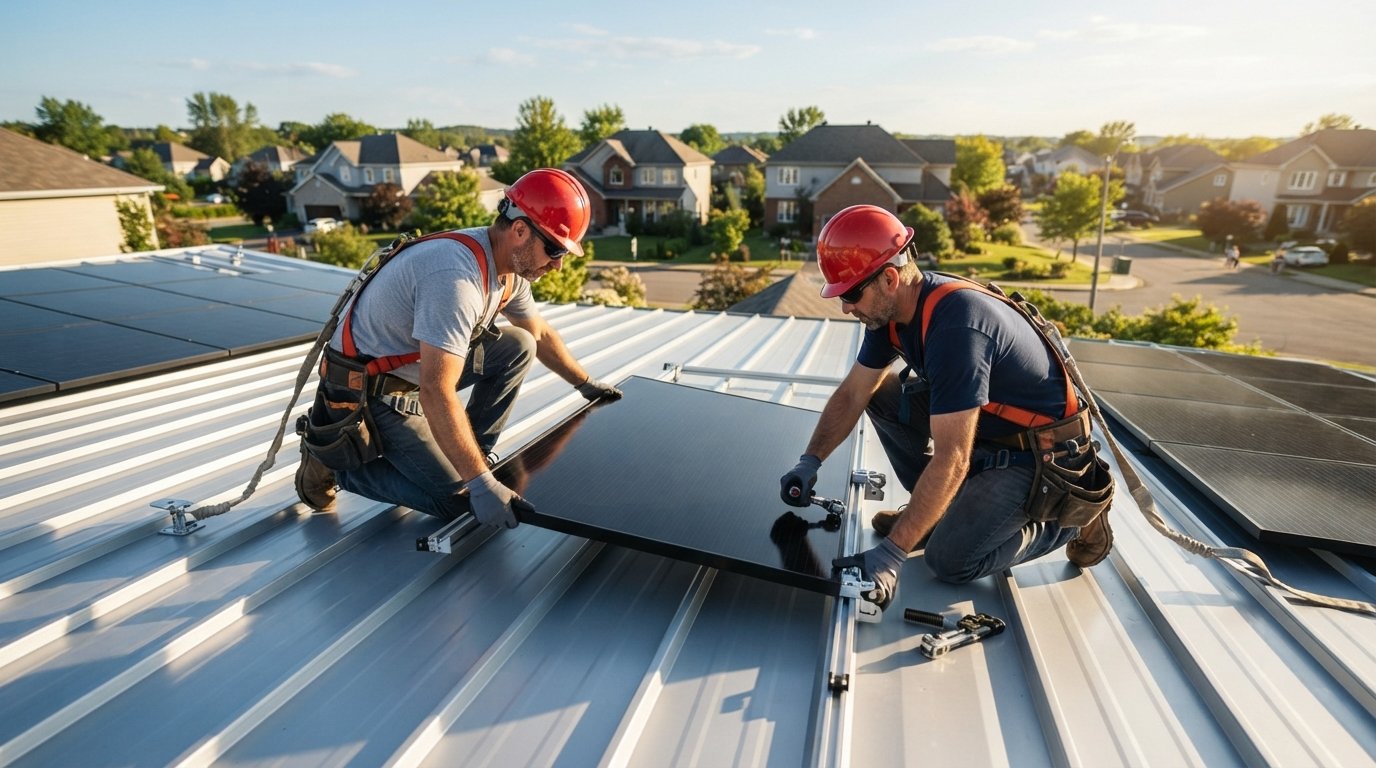
How to Add Solar to a Metal Roof: 2026 Install Guide
Adding solar to a metal roof pairs two long-life assets for decades of clean power. Learn mounting methods, costs, and how to protect your roof warranty.

By Alex Carter
Learn more about Solar Panel Installation and Repair for guides, costs, and what to expect.
Compare Solar Panel Installation and Repair Pros Near You

Enter your ZIP code to compare top-rated local professionals and request free quotes.
A metal roof is one of the best surfaces in the country for capturing sunlight, yet many homeowners hesitate because they assume standing seam panels or exposed fasteners make solar impossible. The opposite is true. Metal roofs often outlast the solar array itself, they shed snow and debris faster than asphalt shingles, and they give installers clean, predictable attachment points. The trick is knowing which mounting method matches your panel profile, how to protect the roof warranty, and how to sequence the work so you are not paying to remove and reinstall a brand new array five years from now. This guide walks through the entire process, from evaluating your roof's readiness to wiring the last inverter and claiming your federal tax credit.
Why Metal Roofs Are a Natural Fit for Solar Panels
Metal roofing has quietly become the preferred substrate for residential solar in the United States, and the reasons go well beyond aesthetics. A standing seam metal roof can last 40 to 70 years, which means it will likely survive two or even three generations of solar equipment. Asphalt shingles, by contrast, typically need replacement every 15 to 25 years, and pulling panels off a failing roof adds thousands of dollars to any project. When you add solar to a metal roof, you are pairing two long-life assets instead of strapping a 25-year array onto a surface that will fail first.
There is also a thermal advantage. Metal reflects more solar radiation than asphalt, so attic temperatures stay lower, and the panels themselves run slightly cooler, which improves efficiency. Snow slides off standing seam profiles in sheets rather than sitting for weeks, so winter production recovers faster in cold-climate states like Colorado, New England, and the upper Midwest. And because metal panels are uniform and structural, installers can often use non-penetrating clamps instead of drilling dozens of holes, preserving the roof's watertight integrity.
That said, not every metal roof is ready on day one. The three variables that matter most are panel profile, roof age and finish, and the structural capacity of the framing beneath. A 30-year-old corrugated barn roof with rusted fasteners is a very different candidate than a two-year-old standing seam system with a Kynar 500 finish. Before you call an installer, spend an afternoon understanding which category your roof falls into, because that single fact determines your mounting method, your labor cost, and whether a reroof should happen first.
Assessing Your Metal Roof Before You Buy Panels
The first step in how to add solar to a metal roof is a honest structural and material audit. Start with the profile. Standing seam panels have raised vertical ribs with no exposed fasteners, which makes them ideal for clamp-on mounts. Corrugated and exposed-fastener panels have visible screws or nails and a wavy surface, which usually requires a different approach. Trapezoidal ribbed panels, common on agricultural and commercial buildings, fall somewhere in between. Each profile dictates which hardware is code-compliant and which voids your roof warranty.
Next, evaluate the age and finish. If your metal roof is more than 25 years old, or if the paint is chalky, peeling, or rusting at the fastener heads, address that before installing solar. Repainting a metal roof after panels are mounted is expensive and awkward, and cutting the array loose to refinish the surface adds 20 to 30 percent to the project cost. If the roof is near the end of its service life, reroof first, then solar. The same logic applies if the roof has active leaks, loose fasteners, or significant oil canning.
Finally, check the structure. Solar adds roughly 2.5 to 4 pounds per square foot of dead load, which most modern metal roofs handle easily, but older homes with undersized purlins or wide rafter spacing may need reinforcement. A licensed structural engineer or your installer can verify this during the site survey. While you are at it, confirm the roof's slope and azimuth. Metal roofs on south-facing slopes between 15 and 40 degrees are ideal, but east and west arrays still produce solid results, especially when paired with net metering or battery storage.
Here is a quick checklist to run through before requesting quotes:
- Identify the panel profile: standing seam, corrugated, trapezoidal, or exposed fastener.
- Note the roof's age, finish type, and whether any panels show rust or chalking.
- Check for active leaks, loose fasteners, or oil canning.
- Confirm roof slope, azimuth, and any shading from trees or chimneys.
- Locate your roof warranty documents and note any transferability terms.
Once you have those answers, you can have a much more productive conversation with installers, and you will be able to spot a low-quality bid immediately. A contractor who does not ask about your panel profile or warranty is not a contractor you want on your roof.
Choosing the Right Mounting Method for Your Panel Profile
Mounting is where metal roof solar projects succeed or fail. There are three main approaches, and the right one depends entirely on your panel profile. Getting this wrong can void your roof warranty, create leak points, or force you to remove the array later.
Standing seam clamps are the gold standard. These non-penetrating brackets grip the raised seam without piercing the metal, so no new holes are introduced. They are fast to install, they preserve the roof warranty when installed per the manufacturer's specifications, and they allow for thermal expansion and contraction. The main limitation is that they only work on standing seam profiles with seams that are strong enough to hold the clamp, typically 1 inch to 2 inches tall. If your roof has that profile, insist on clamps.
Exposed-fastener mounts are used on corrugated and trapezoidal panels. These require drilling through the metal and sealing the penetration with EPDM gaskets or butyl tape. When done correctly, with proper flashing and sealant, these mounts are reliable for decades. When done poorly, they become the source of every leak you will ever have. The key is that the fastener must land on the crest of the rib or on a purlin, never in the valley where water pools. Some manufacturers offer specific brackets designed for corrugated profiles that include a rubber boot and a metal flashing plate.
Adhesive or ballasted mounts are rare in residential metal roof work, but they appear occasionally on commercial flat metal roofs or on profiles where penetration is absolutely forbidden. These systems rely on weight or structural adhesive rather than mechanical fasteners. They are heavier, more expensive, and less common, but they can be a good fit for certain low-slope metal applications.
Before you commit, verify two things with your installer. First, ask for the roof manufacturer's written approval for the specific mount being proposed. Most major metal roof brands publish compatibility lists, and using an unapproved mount can void your warranty. Second, ask how the installer will manage thermal expansion. Metal roofs move more than shingle roofs, and rigid mounting systems that do not allow for movement can loosen over time. A good installer will account for this in the design.
Step-by-Step: How to Add Solar to a Metal Roof
Once you have confirmed your roof is ready and chosen the mounting method, the installation itself follows a predictable sequence. Every project is different, but the general flow looks like this.
- Site survey and structural check. An installer measures the roof, confirms the panel profile, verifies rafter or purlin spacing, and checks the electrical panel for capacity. This is when you should ask about the roof warranty and confirm the mounting hardware in writing.
- System design and permitting. The installer designs the array layout, sizes the inverter and any battery, and submits permit applications to your local jurisdiction and utility. In most states, this takes two to six weeks.
- Mounting hardware installation. Clamps or flashed brackets are installed on the roof, aligned to the array layout. For standing seam, this is fast and clean. For exposed fastener, each penetration is sealed and flashed individually.
- Rail and panel installation. Mounting rails are attached to the brackets, then the solar panels are set, aligned, and clamped to the rails. Wire management is routed underneath the panels.
- Electrical wiring and inverter connection. DC wiring runs from the array to the inverter, then AC wiring runs to your main panel. A rapid shutdown device and disconnects are installed per code.
- Inspection, commissioning, and utility approval. The local authority inspects the work, the utility grants permission to operate, and the system is turned on. This is when you can finally start watching your meter spin backward.
In most U.S. markets, a residential metal roof solar installation takes one to three days on the roof, plus several weeks of permitting and utility coordination. The actual roof work is often faster on metal than on shingles because there is no shingle cutting or flashing work beyond the mounts. The complexity is front-loaded into design and permitting, not the physical install.
If you would rather not manage the process alone, you can compare vetted local installers through resources like FreeSolarPowerQuotes, which connects homeowners with pre-screened solar professionals and provides free, no-obligation estimates. Getting multiple quotes is the single best way to avoid overpaying, and it also lets you compare how different installers handle metal roof mounting details.
Warranties, Penetrations, and Leak Prevention
The biggest fear homeowners have about metal roof solar is leaks, and it is a legitimate concern. Metal roofs are designed to shed water, and every penetration is a potential failure point. The good news is that with modern flashing and sealant systems, a properly installed metal roof solar array is no more likely to leak than the roof itself. The bad news is that a poorly installed array can create problems that take years to show up.
If you use standing seam clamps, you avoid the problem entirely. No holes, no sealant, no leak risk. This is why standing seam is the preferred profile for solar, and why some homeowners choose to upgrade to standing seam specifically because they plan to add solar. The cost of the upgrade is often offset by lower installation labor and the peace of mind that comes with a non-penetrating mount.
If you have an exposed-fastener roof, the installer must use proper flashing. That means a metal plate or boot that slides under the panel and over the fastener, sealed with a high-grade polyurethane or silicone sealant rated for metal roofs. Never accept a mount that relies on sealant alone, and never accept a mount that puts a fastener in a valley where water flows. Ask your installer to show you a mockup or a photo of a previous install on the same profile.
Warranty issues cut both ways. Your metal roof warranty may be voided by unapproved penetrations, so get written confirmation from the roof manufacturer before work begins. Your solar panel and inverter warranties are separate, and they typically run 25 years for panels and 10 to 12 years for inverters. Some solar mounting manufacturers offer their own 25-year warranty on clamps and rails, which is worth confirming. Keep all warranty documents in one place, because you will need them if you ever sell the home or file a claim.
Costs, Incentives, and Payback for Metal Roof Solar
Adding solar to a metal roof generally costs about the same as adding it to an asphalt shingle roof, sometimes slightly less because the install is faster. The national average for a residential solar system in 2026 runs roughly $2.50 to $3.50 per watt before incentives, which puts a typical 8 kilowatt system at $20,000 to $28,000. Metal roof mounting hardware itself adds a small premium, usually a few hundred dollars per array, but the labor savings from clamp-on mounts often offset it.
The federal Residential Clean Energy Credit covers 30 percent of the total system cost, including labor and mounting hardware, and it has no dollar cap for residential systems. Many states add their own incentives on top. Texas, Florida, and Arizona have strong sun and relatively simple net metering or buyback rules. Colorado, Massachusetts, and New York offer state-level rebates or tax credits that can push the total incentive past 40 percent. Your utility may also offer a production-based incentive or a time-of-use rate that rewards you for exporting power in the late afternoon.
Payback periods vary widely. In high-electricity markets like California or the Northeast, a metal roof solar system can pay for itself in seven to ten years. In lower-rate markets, it may take 12 to 15 years. But because metal roofs last so long, the array often produces for 25 to 30 years, which means 15 or more years of essentially free electricity after payback. Pairing the array with a battery can improve the economics further if your utility has unfavorable net metering rules, because you can store excess production and use it during peak rate hours.
One more financial angle worth noting: a solar array on a metal roof can increase home resale value. Studies from Zillow and the Lawrence Berkeley National Laboratory have found that solar homes sell for a premium, and metal roofs are already viewed as a high-end upgrade. The combination is attractive to buyers who want low maintenance and low utility bills.
Common Mistakes to Avoid
The most common mistake is installing solar on a metal roof that is nearing the end of its life. If your roof has less than 15 years of remaining service life, reroof first. The cost of removing and reinstalling solar later is significant, and it is entirely avoidable with better sequencing.
The second mistake is accepting a bid that does not specify the mounting hardware by brand and model. Vague language like "standard mounts" or "roof attachments" leaves the door open for cheap hardware that may not be approved for your profile. Ask for the manufacturer, part number, and warranty term in writing.
The third mistake is ignoring the electrical panel. Many older homes have 100-amp service that cannot accommodate a solar backfeed without an upgrade. A good installer will check this during the site survey and include any panel upgrade in the quote, not surprise you with it later.
Finally, do not skip the utility approval step. Installing a system without permission to operate can result in fines, forced disconnection, or loss of incentives. Your installer should handle this, but you should confirm that the utility has granted approval before the system is energized.
Making the Decision
Adding solar to a metal roof is one of the smartest renewable energy moves a homeowner can make. The roof lasts longer than the array, the mounting options are clean and reliable, and the combined asset adds value to your property while cutting your electric bill. The key is to assess your roof honestly, choose the right mount for your panel profile, and insist on written confirmation of warranty compatibility before anyone drills a hole or tightens a clamp.
If you are ready to move forward, the next step is simple: get multiple quotes from installers who have specific experience with metal roofs. Compare their mounting approach, their warranty language, and their total price after incentives. With the right team and the right hardware, your metal roof can quietly generate clean power for decades, and you will wonder why you waited so long.